Project Provider Guide
We have designed our platform to be as simple and user friendly as possible. After years of answering applicant questions, conducting interviews and processing applications, we have designed our platform to be as intuitive as possible, using the steps below;
Table of Contents
2a) Application Form Section
2b) View Messages
2c) Alternate View Messages
3a)View Application button
3b) Review Costs button
3c) Approval Message
3d) Chasing
4a) Update Balance Fee amount
5a) Successful Payments
5b) Archive Applications
1. New Application
When an applicant fills in an application form, or sends in an enquiry message, you will firstly receive a notification email.
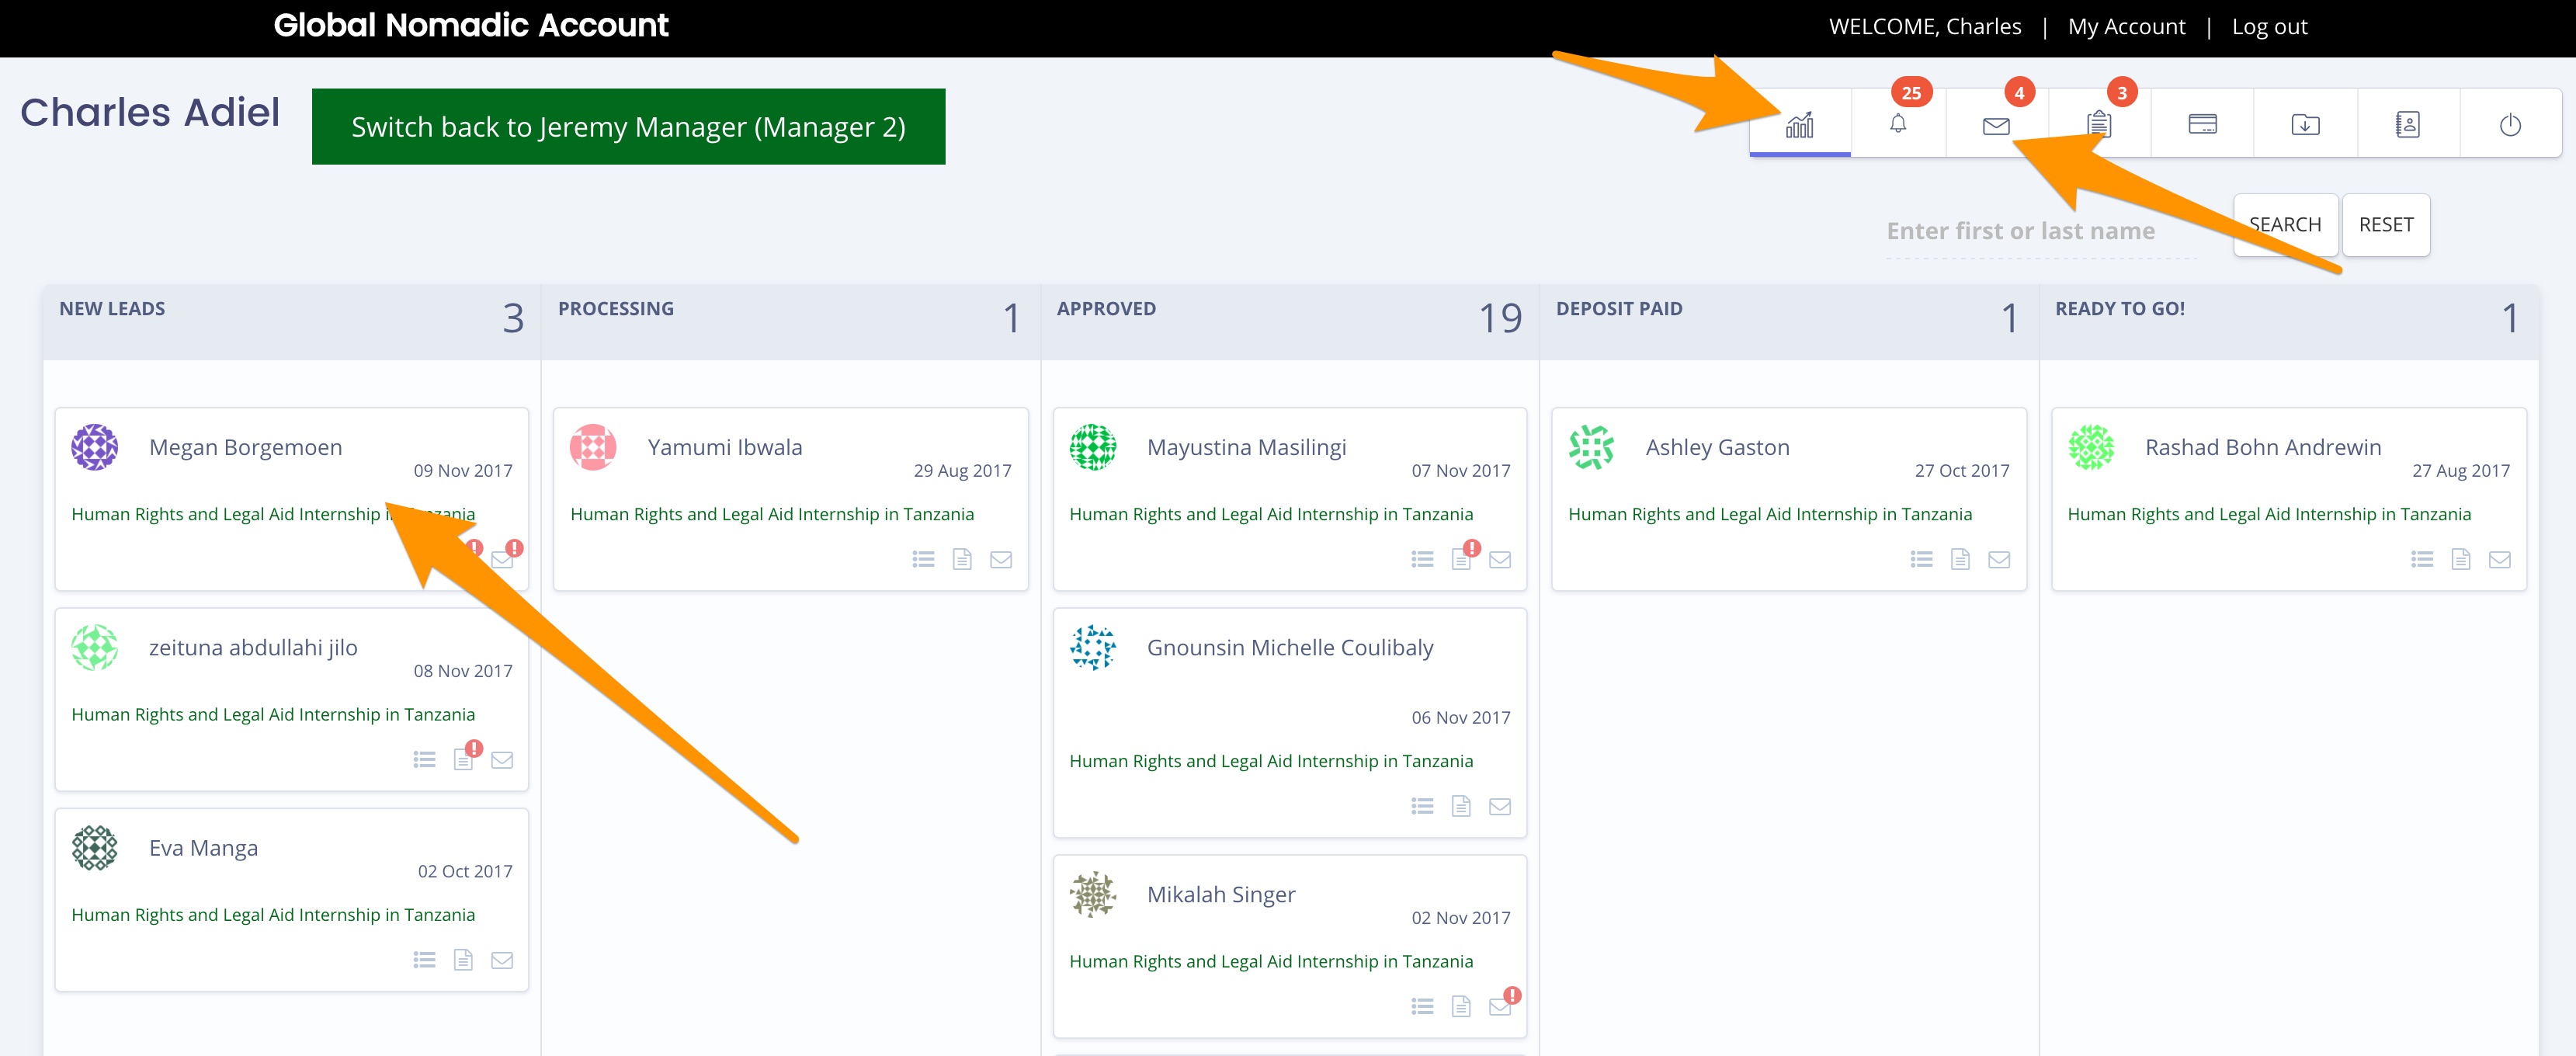
When you login, this is the first page you will see. All New applications will be in the first pipeline. As soon as you click on it, it will automatically move into the Processing pipeline.
You can also access this page at any time by clicking on the Sales Board icon in the top right menu.
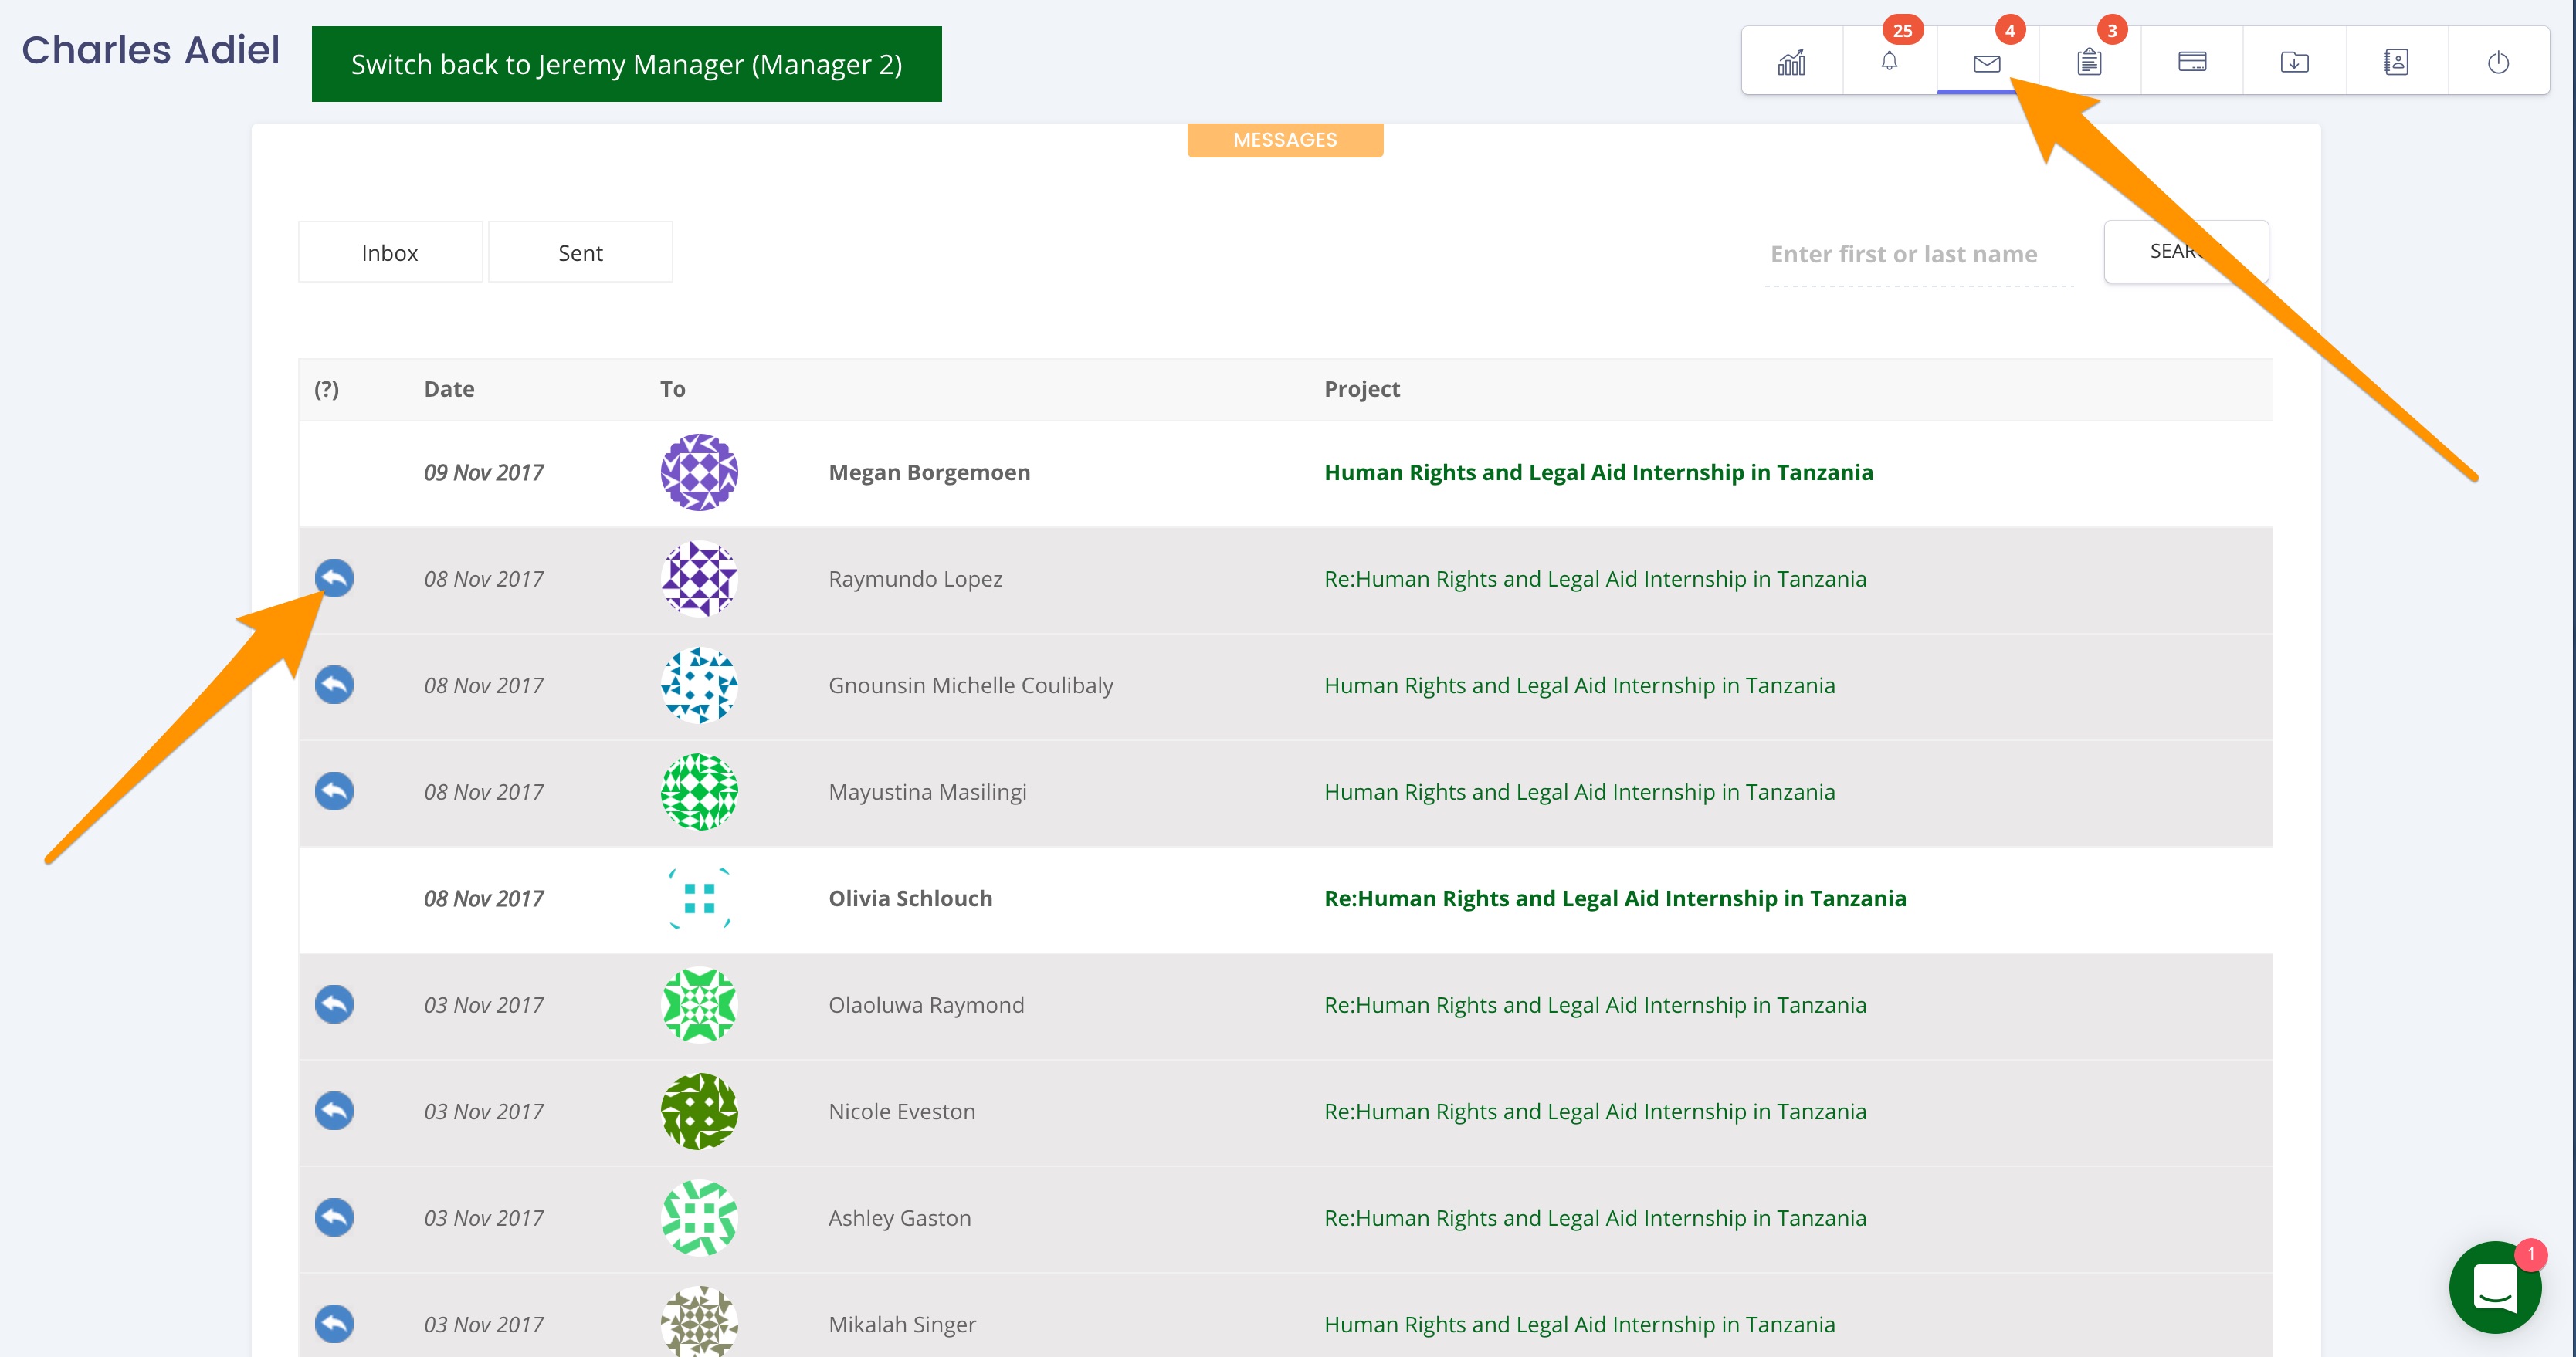
You can see all of your messages by clicking on the Message icon in the top right menu bar.
2. Process Application
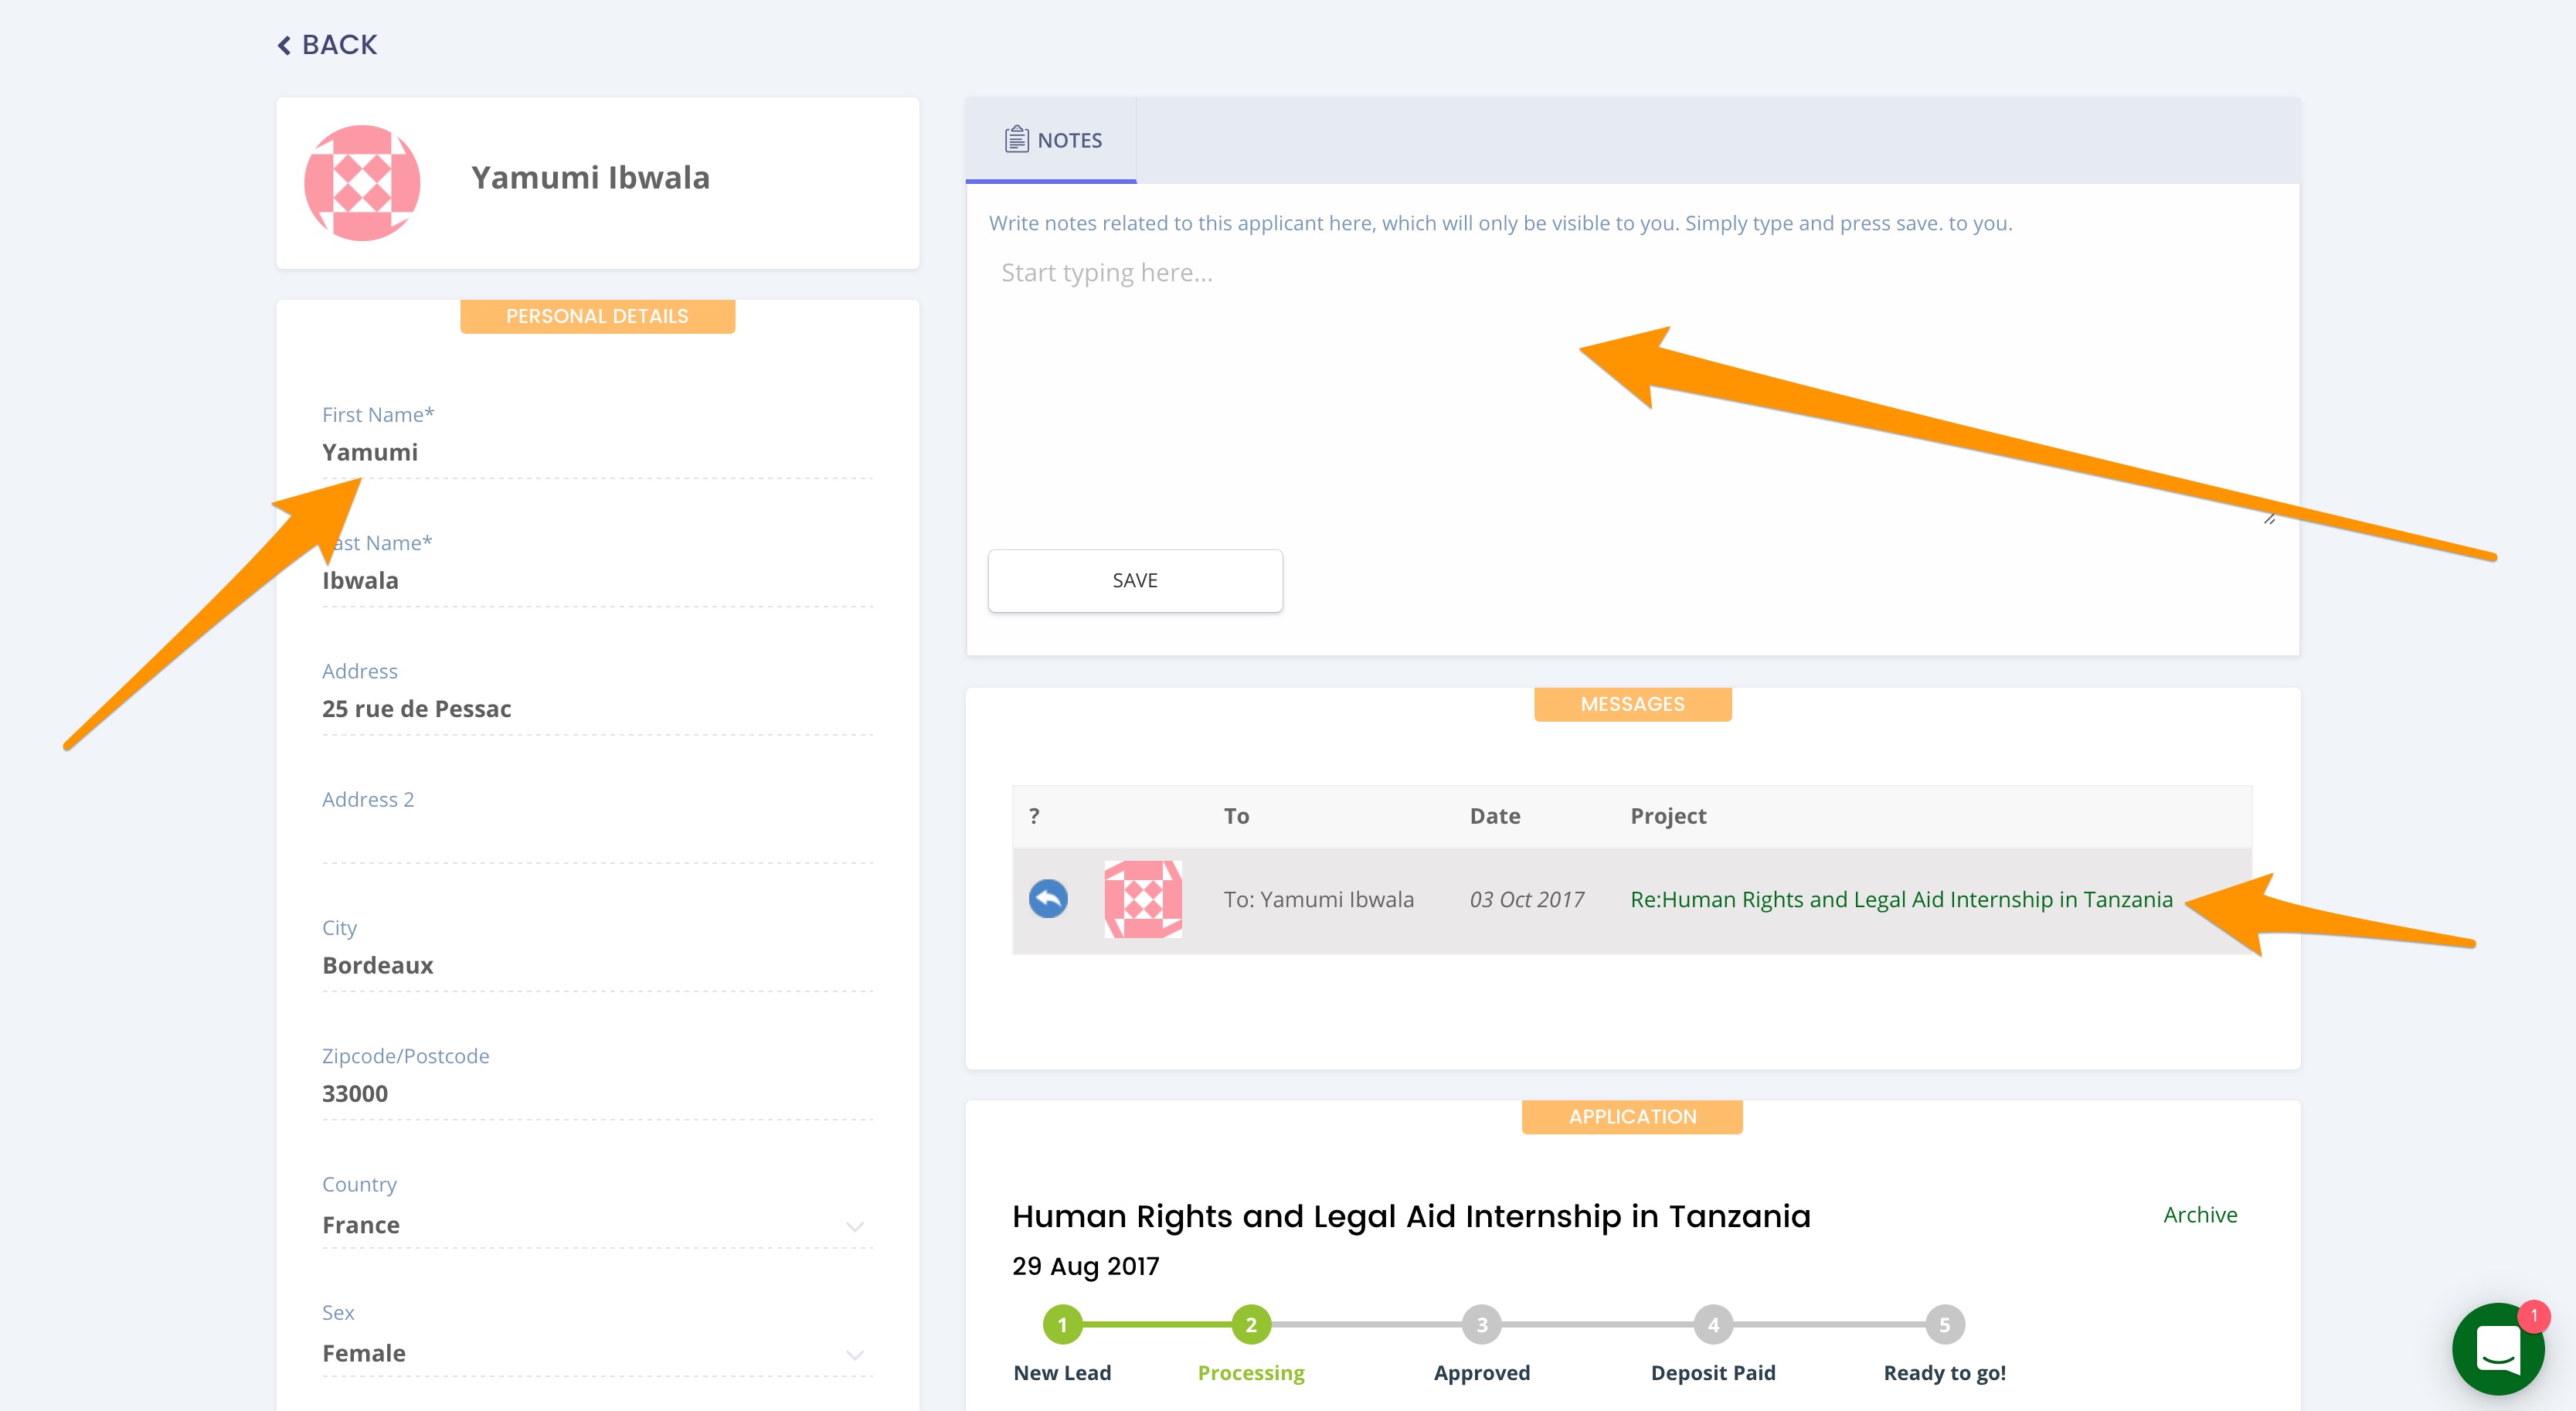
Click on the Application card and it will open up into this page. Here you can see all of the Applicants Details, Uploaded Documents (CV, Cover letter etc.) and any Messages sent & received.
You can also write any Notes about the applicant – of which only you will have access to.
2a) Application Form Section
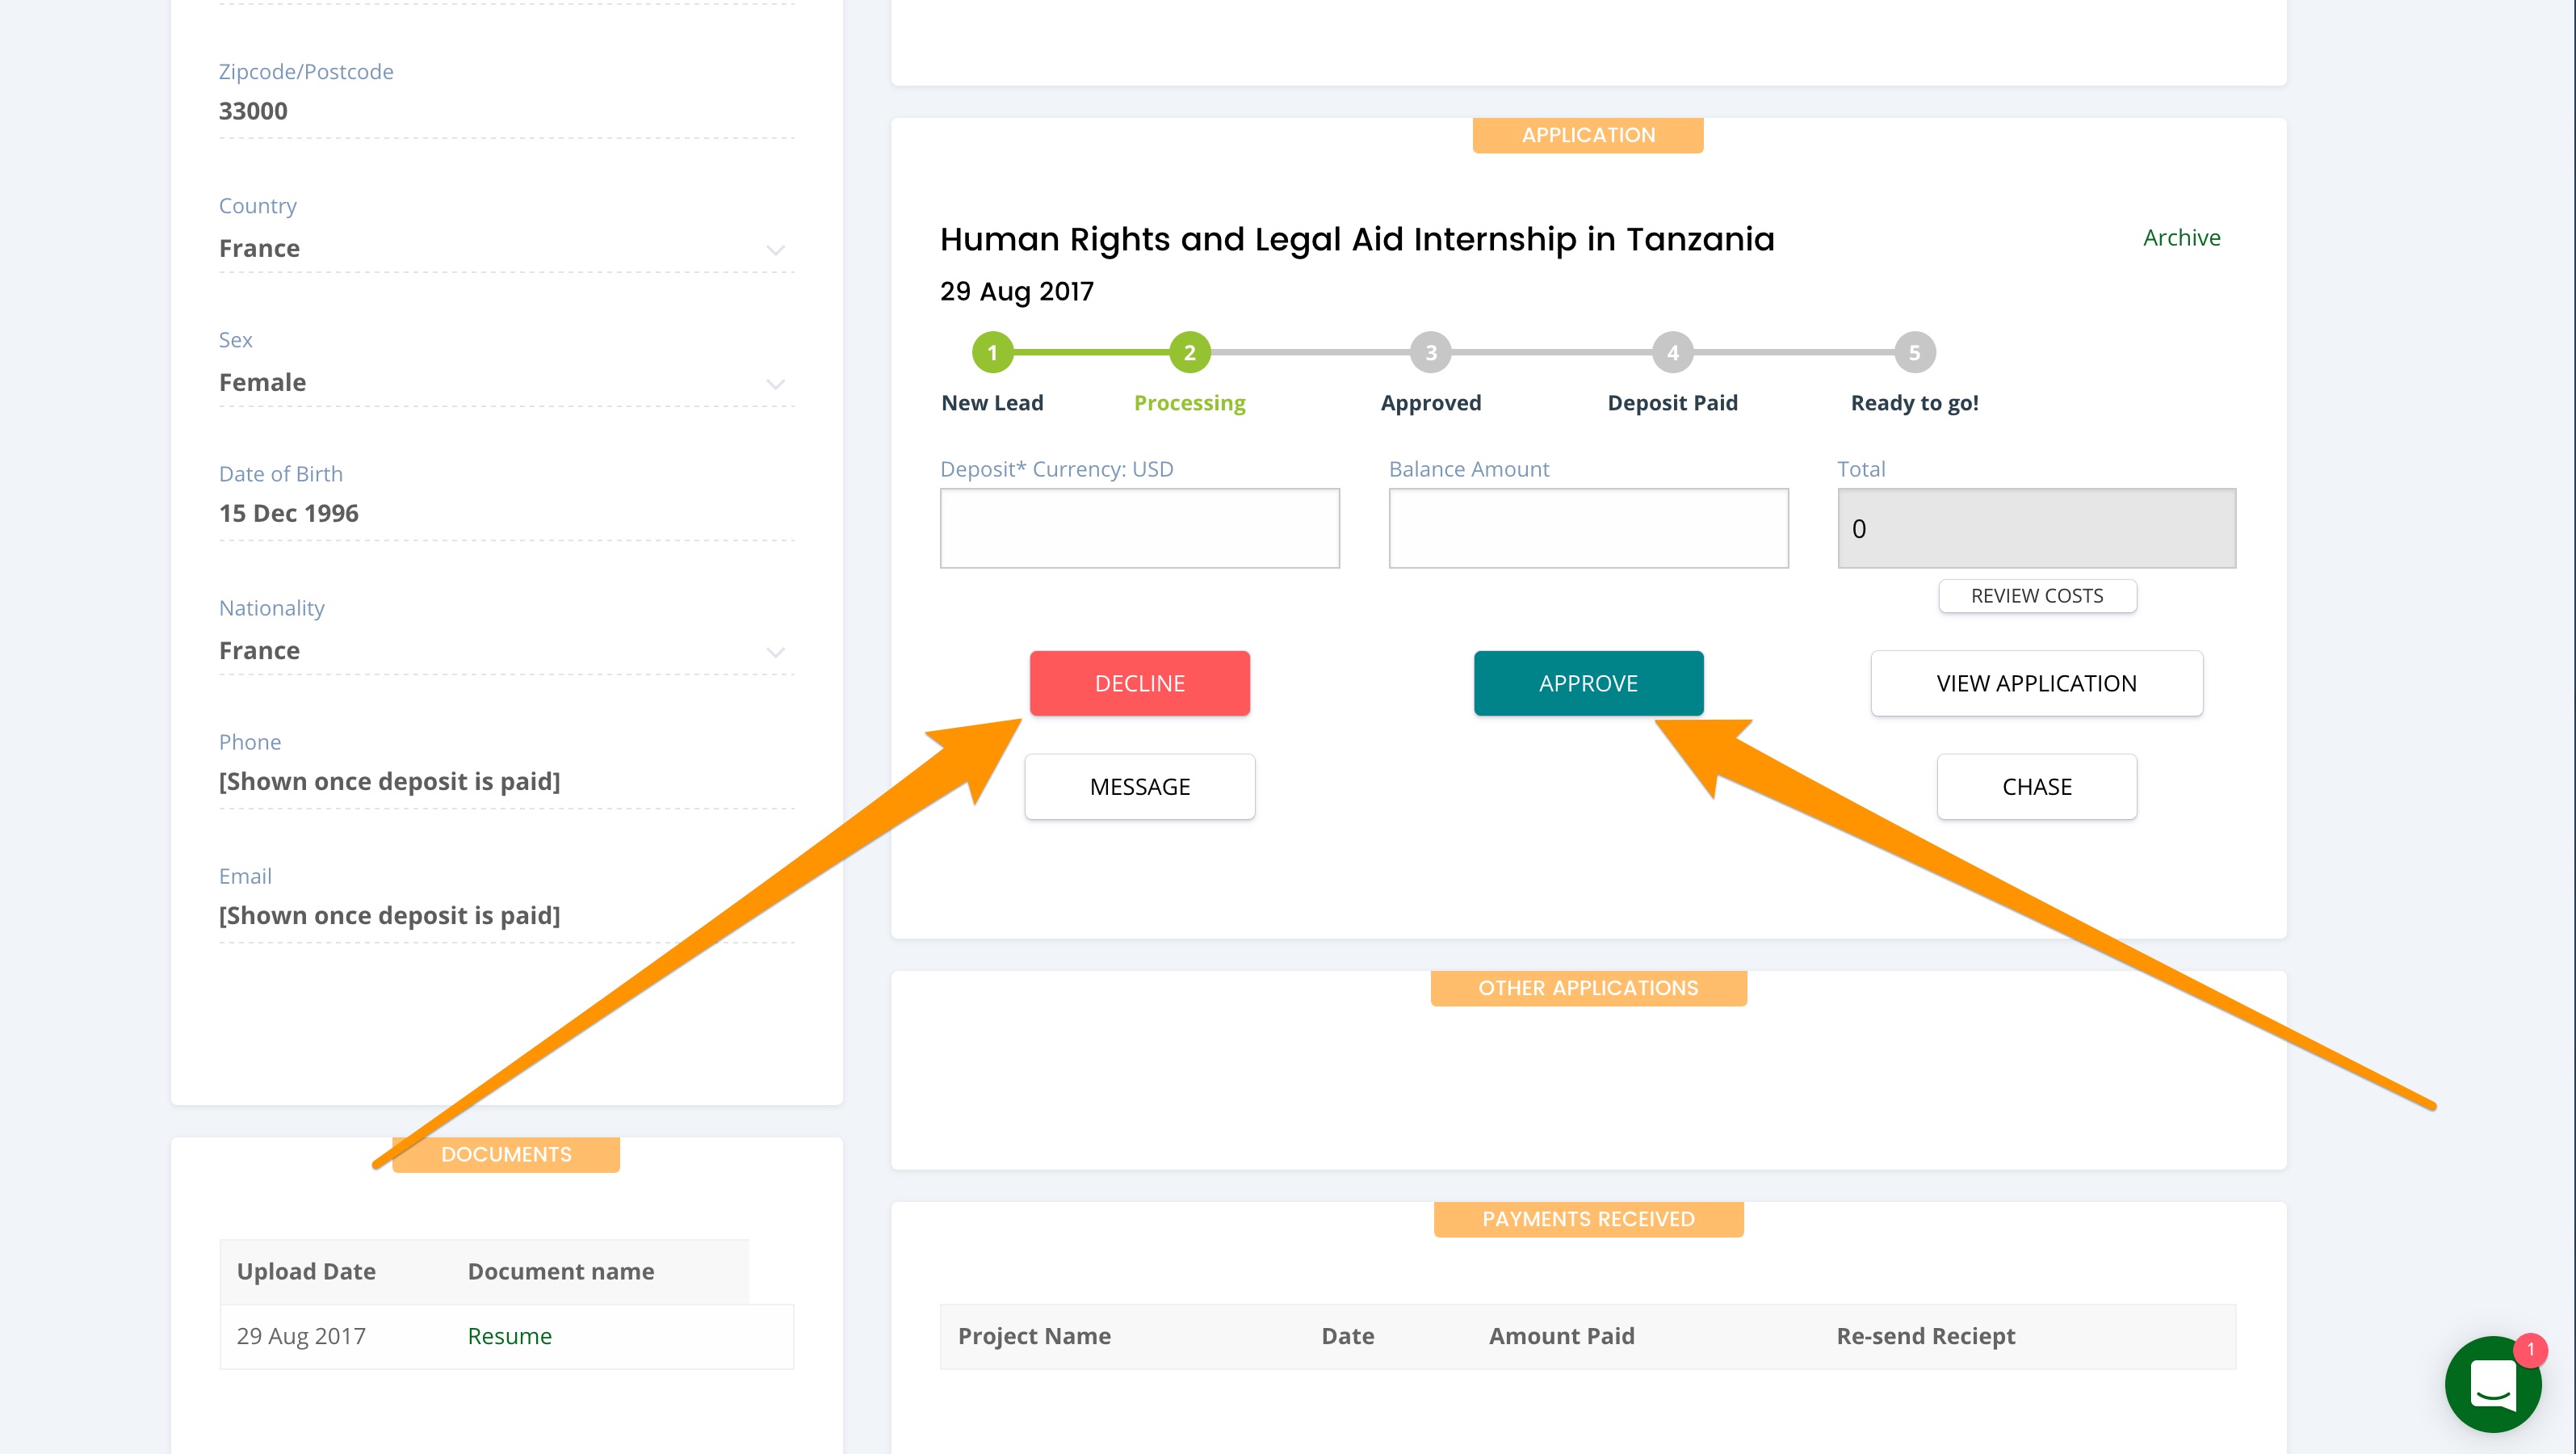
If you scroll down you will see a list of all of the Applications Received from this specific applicant. You will also see all of the Buttons needed to process the application (explained in detail further down)
2b) View Messages
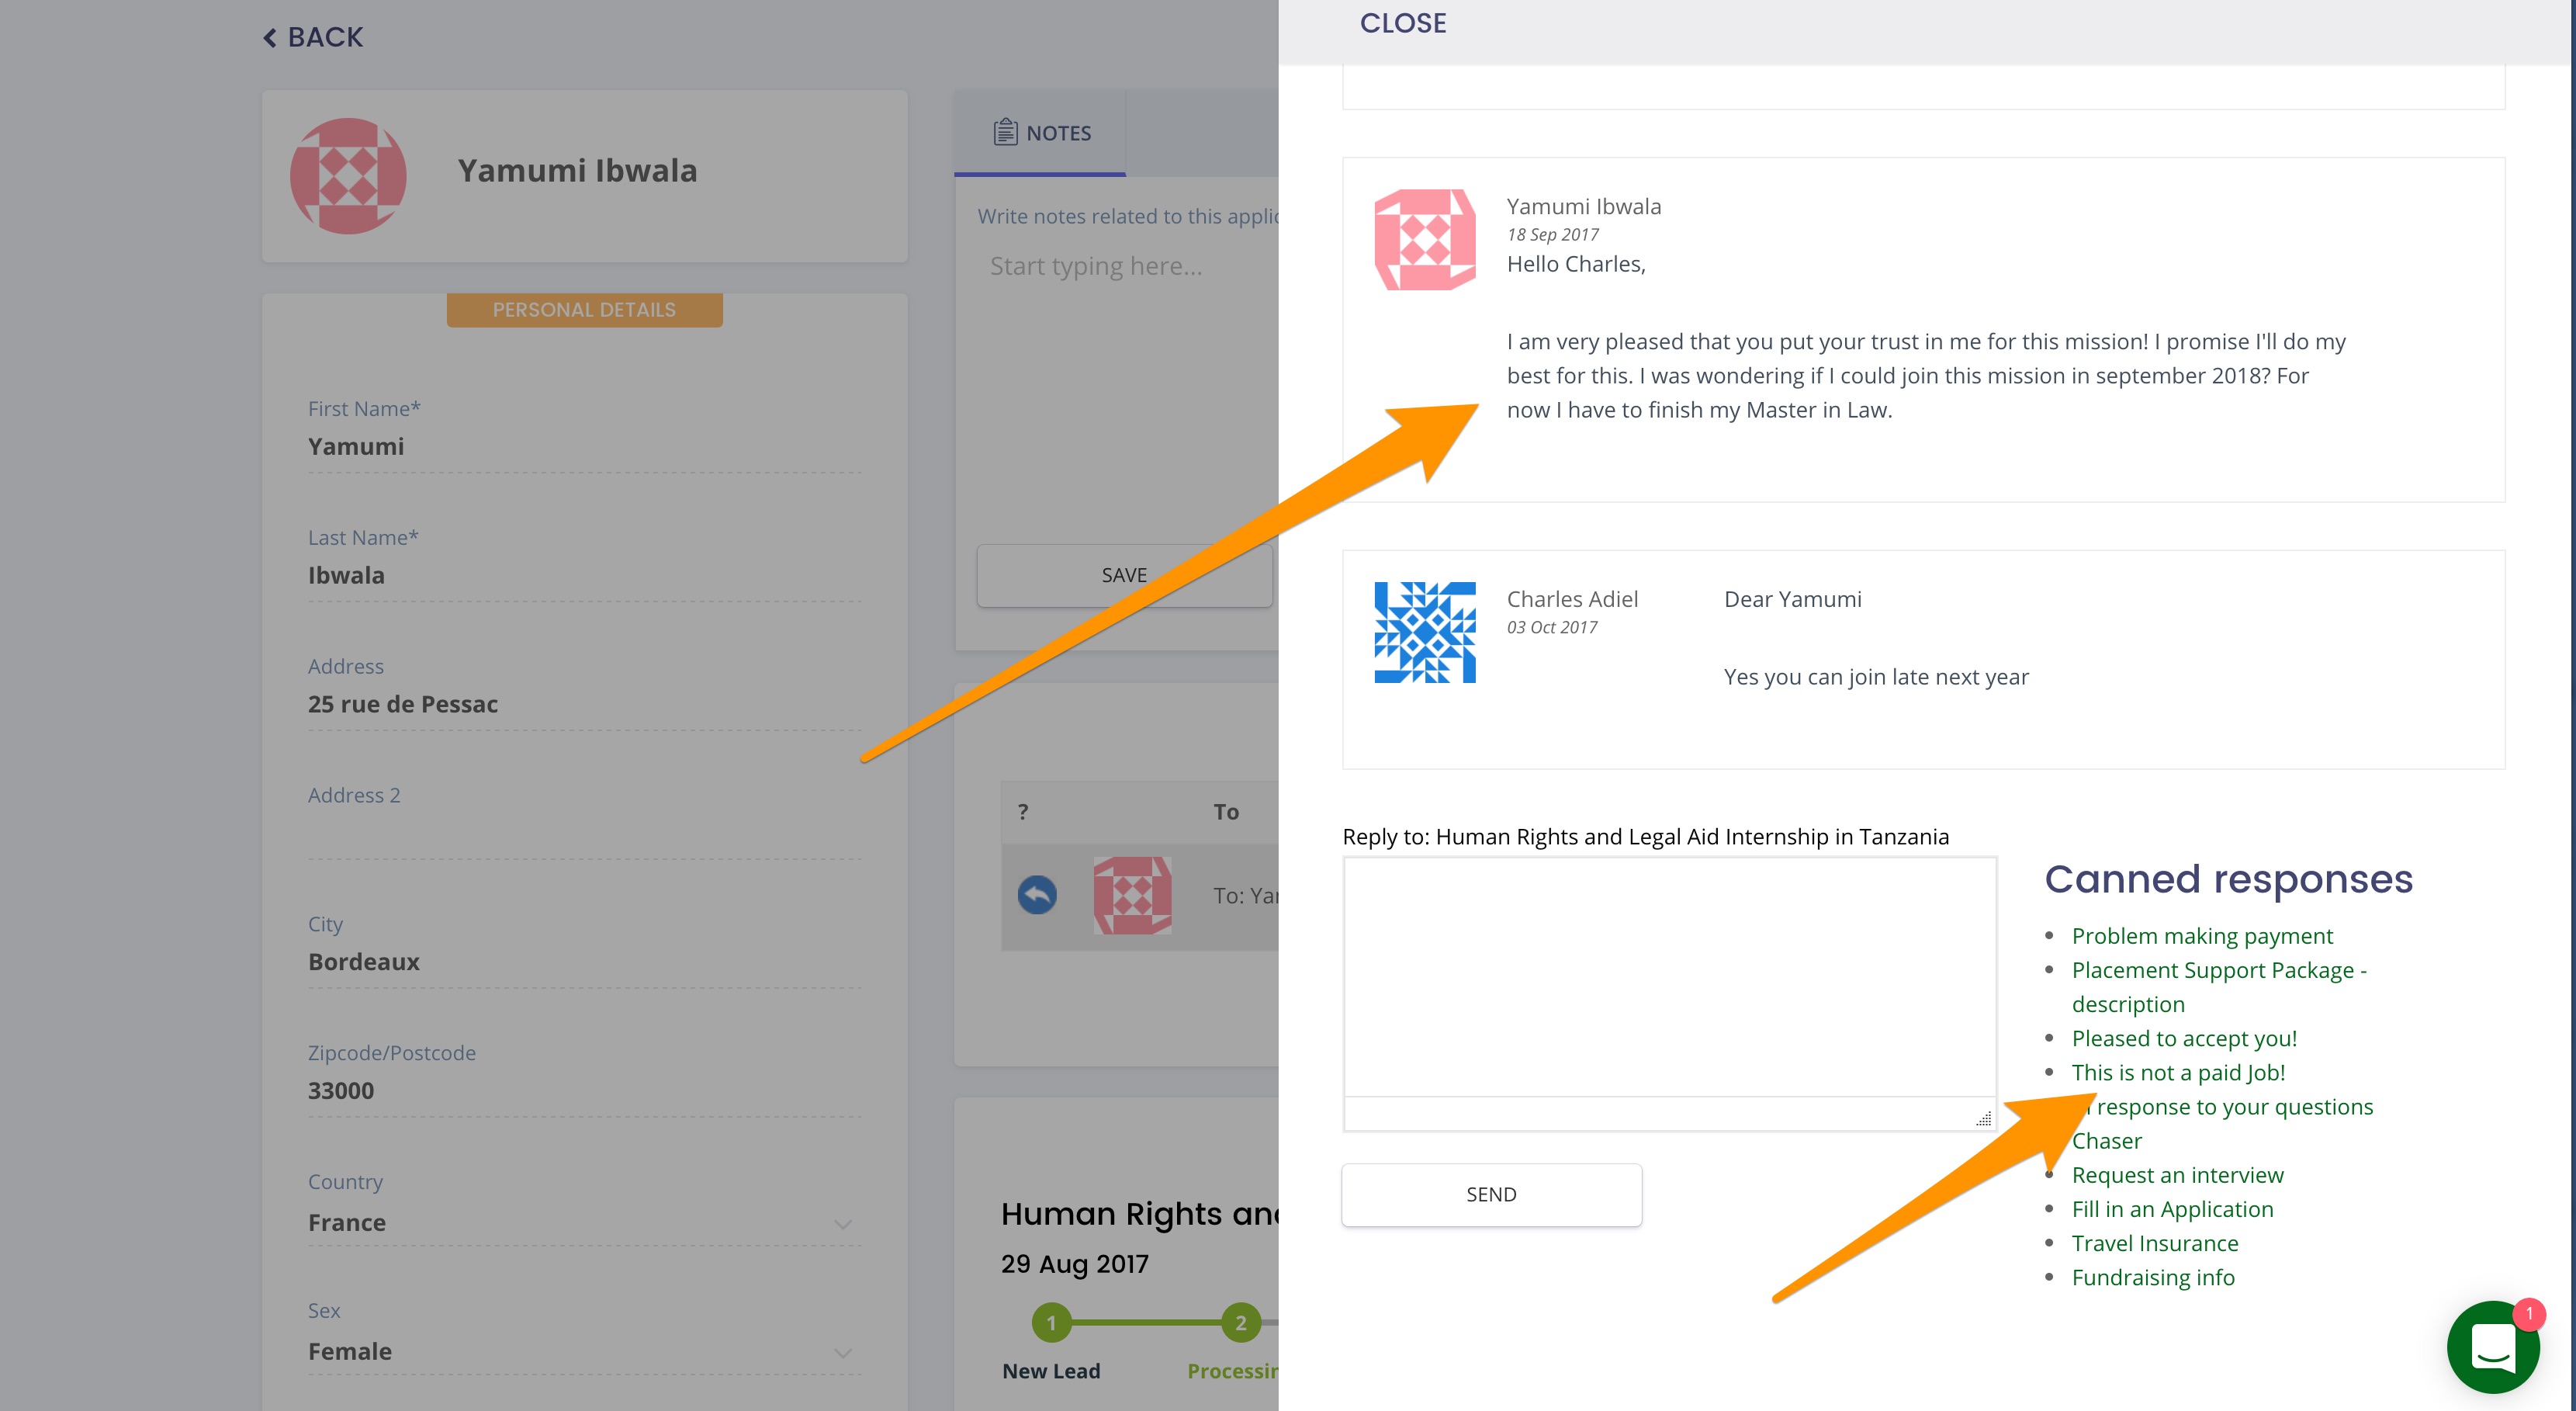
If you click on the Messages tab, the entire thread will open up.
You can use the Canned Responses to quickly add standard template replies to make your life easy.
2c) Alternate way to View Messages
Alternatively, you can also see all of the Messages (including new messages from clients who have not yet applied) by clicking on the Message icon in the top right menu.
The Blue Icon appears if you have already responded to this message. Any message without this icon is awaiting your response (if applicable).
3. Approve an Application
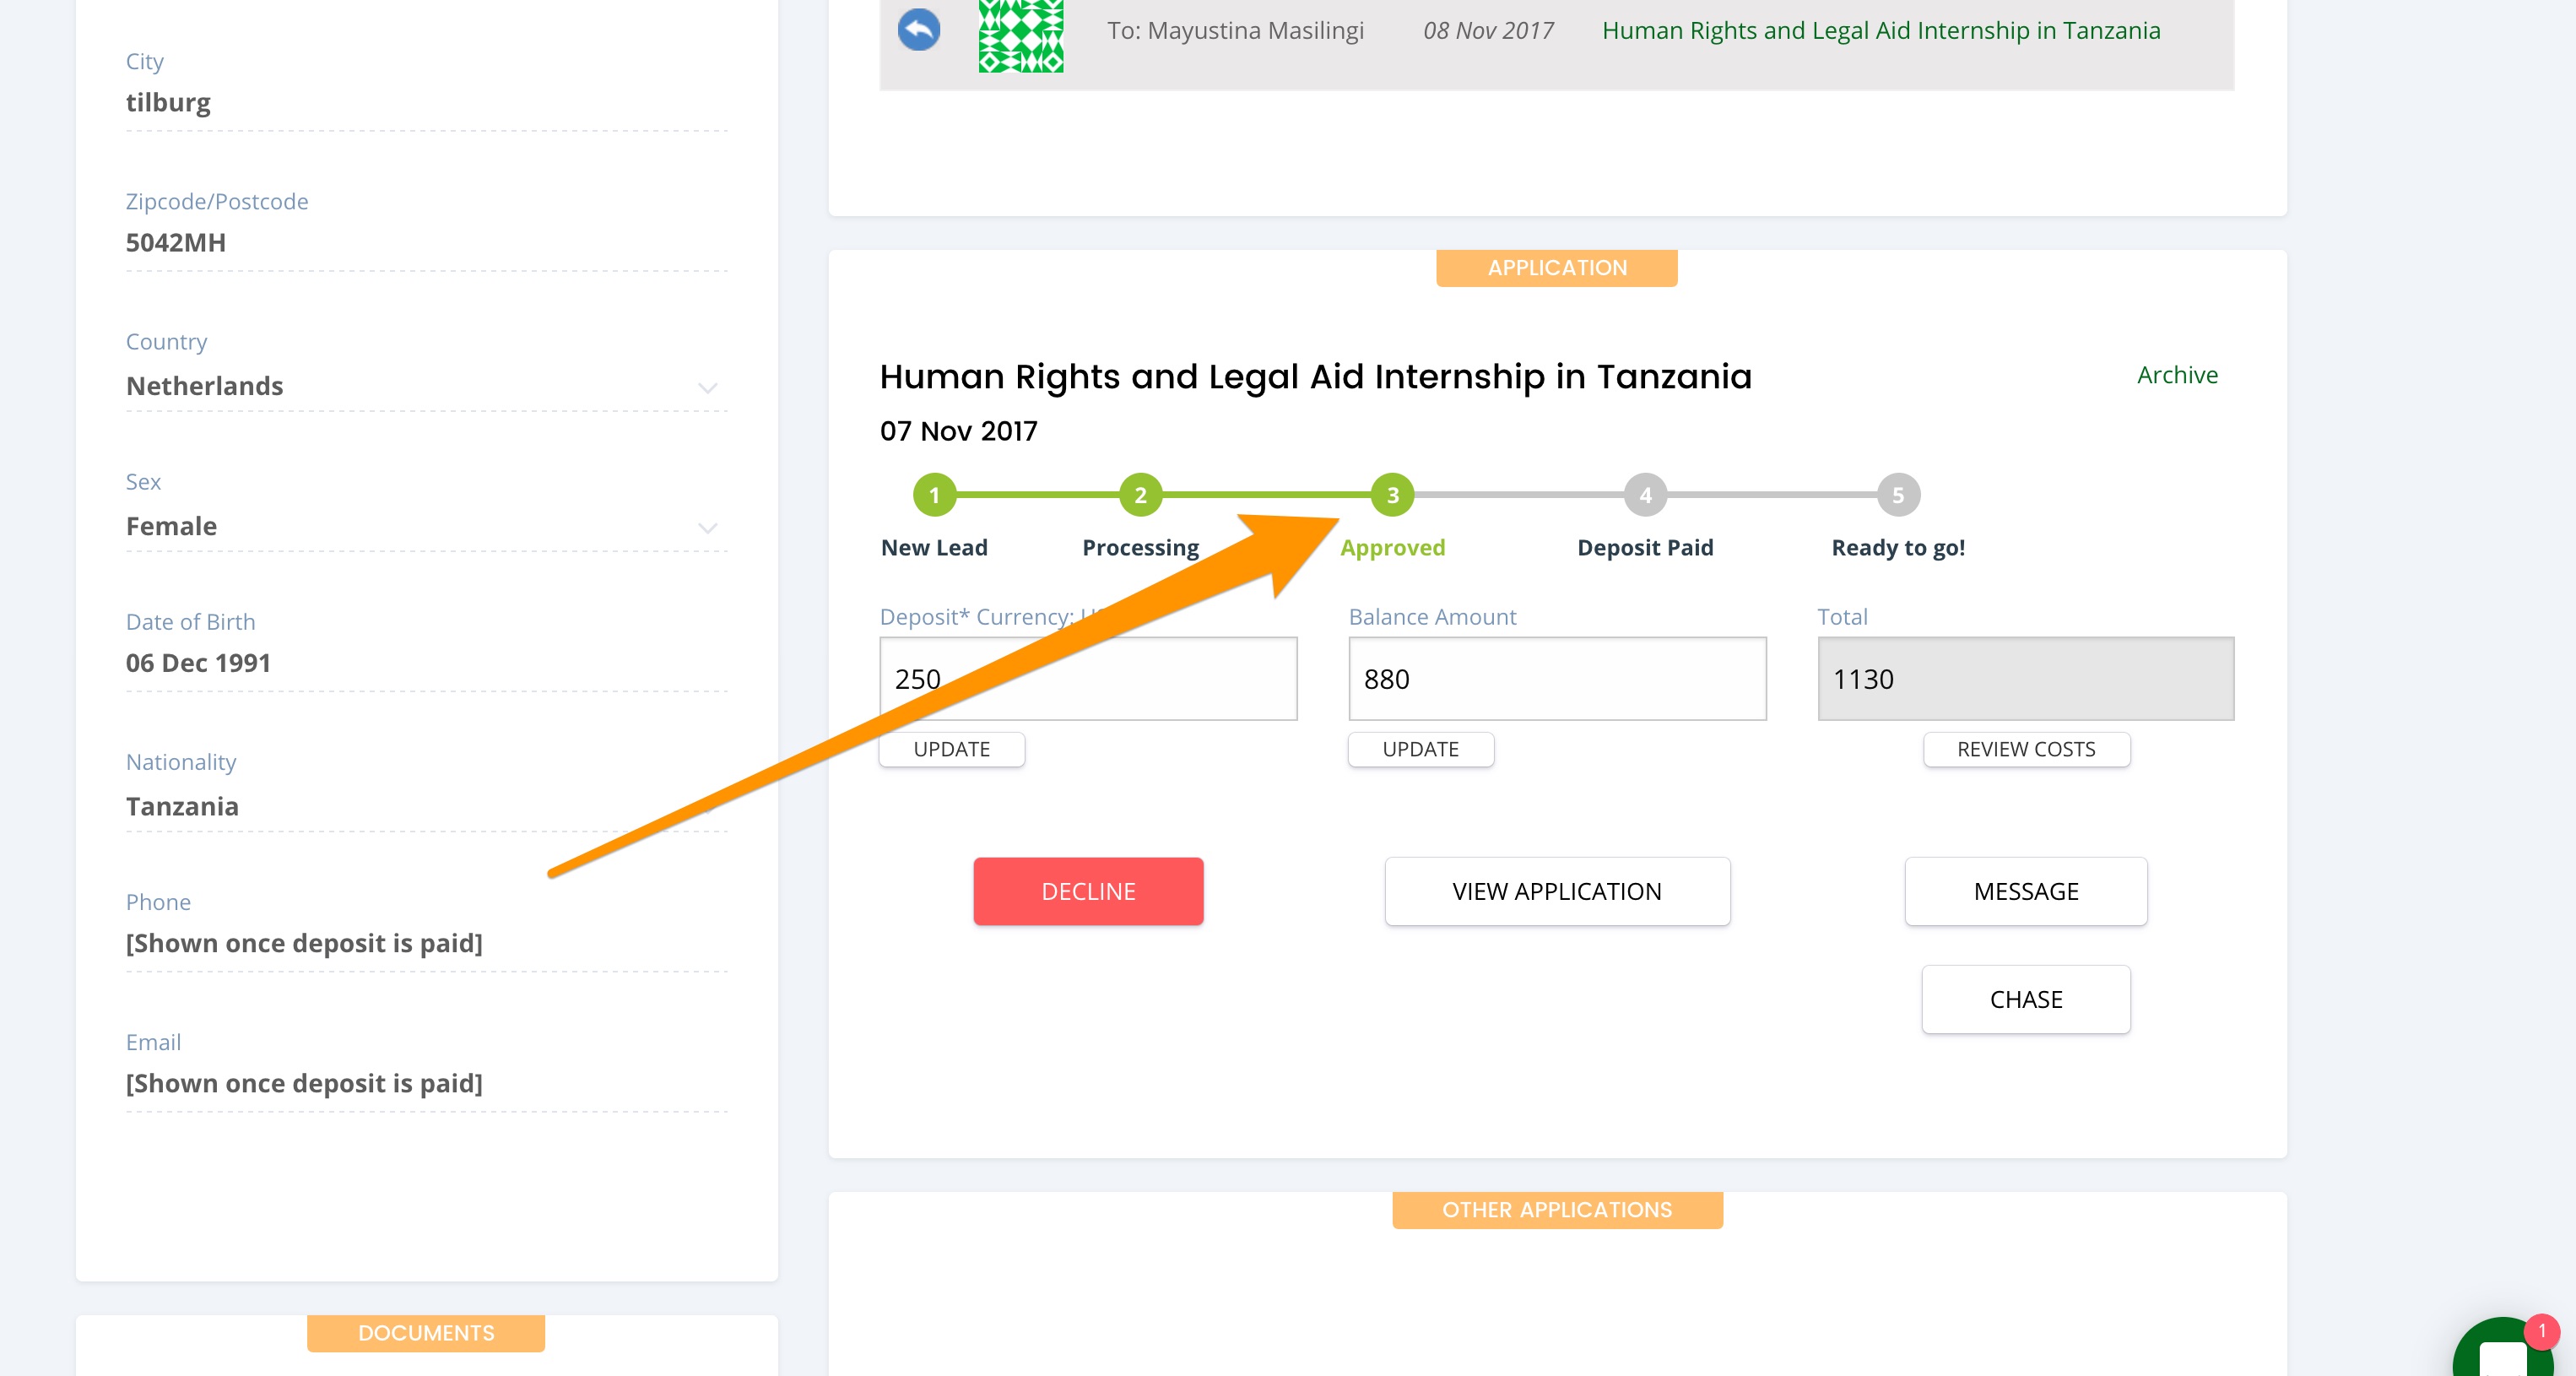
To Approve or Decline an application, simply click on the relevant button. Once an application is Approved, it will automatically be added the to the Approved Status.
When you Approve or Decline an application, an editable text box will popup (see further down). If you are Declining an application, please explain why you are rejecting the application. The applicant will be sent your message and the application will automatically archive itself.
If you need to retrieve an archived application, let us know and we will find and restore it for you.
3a) View Application button
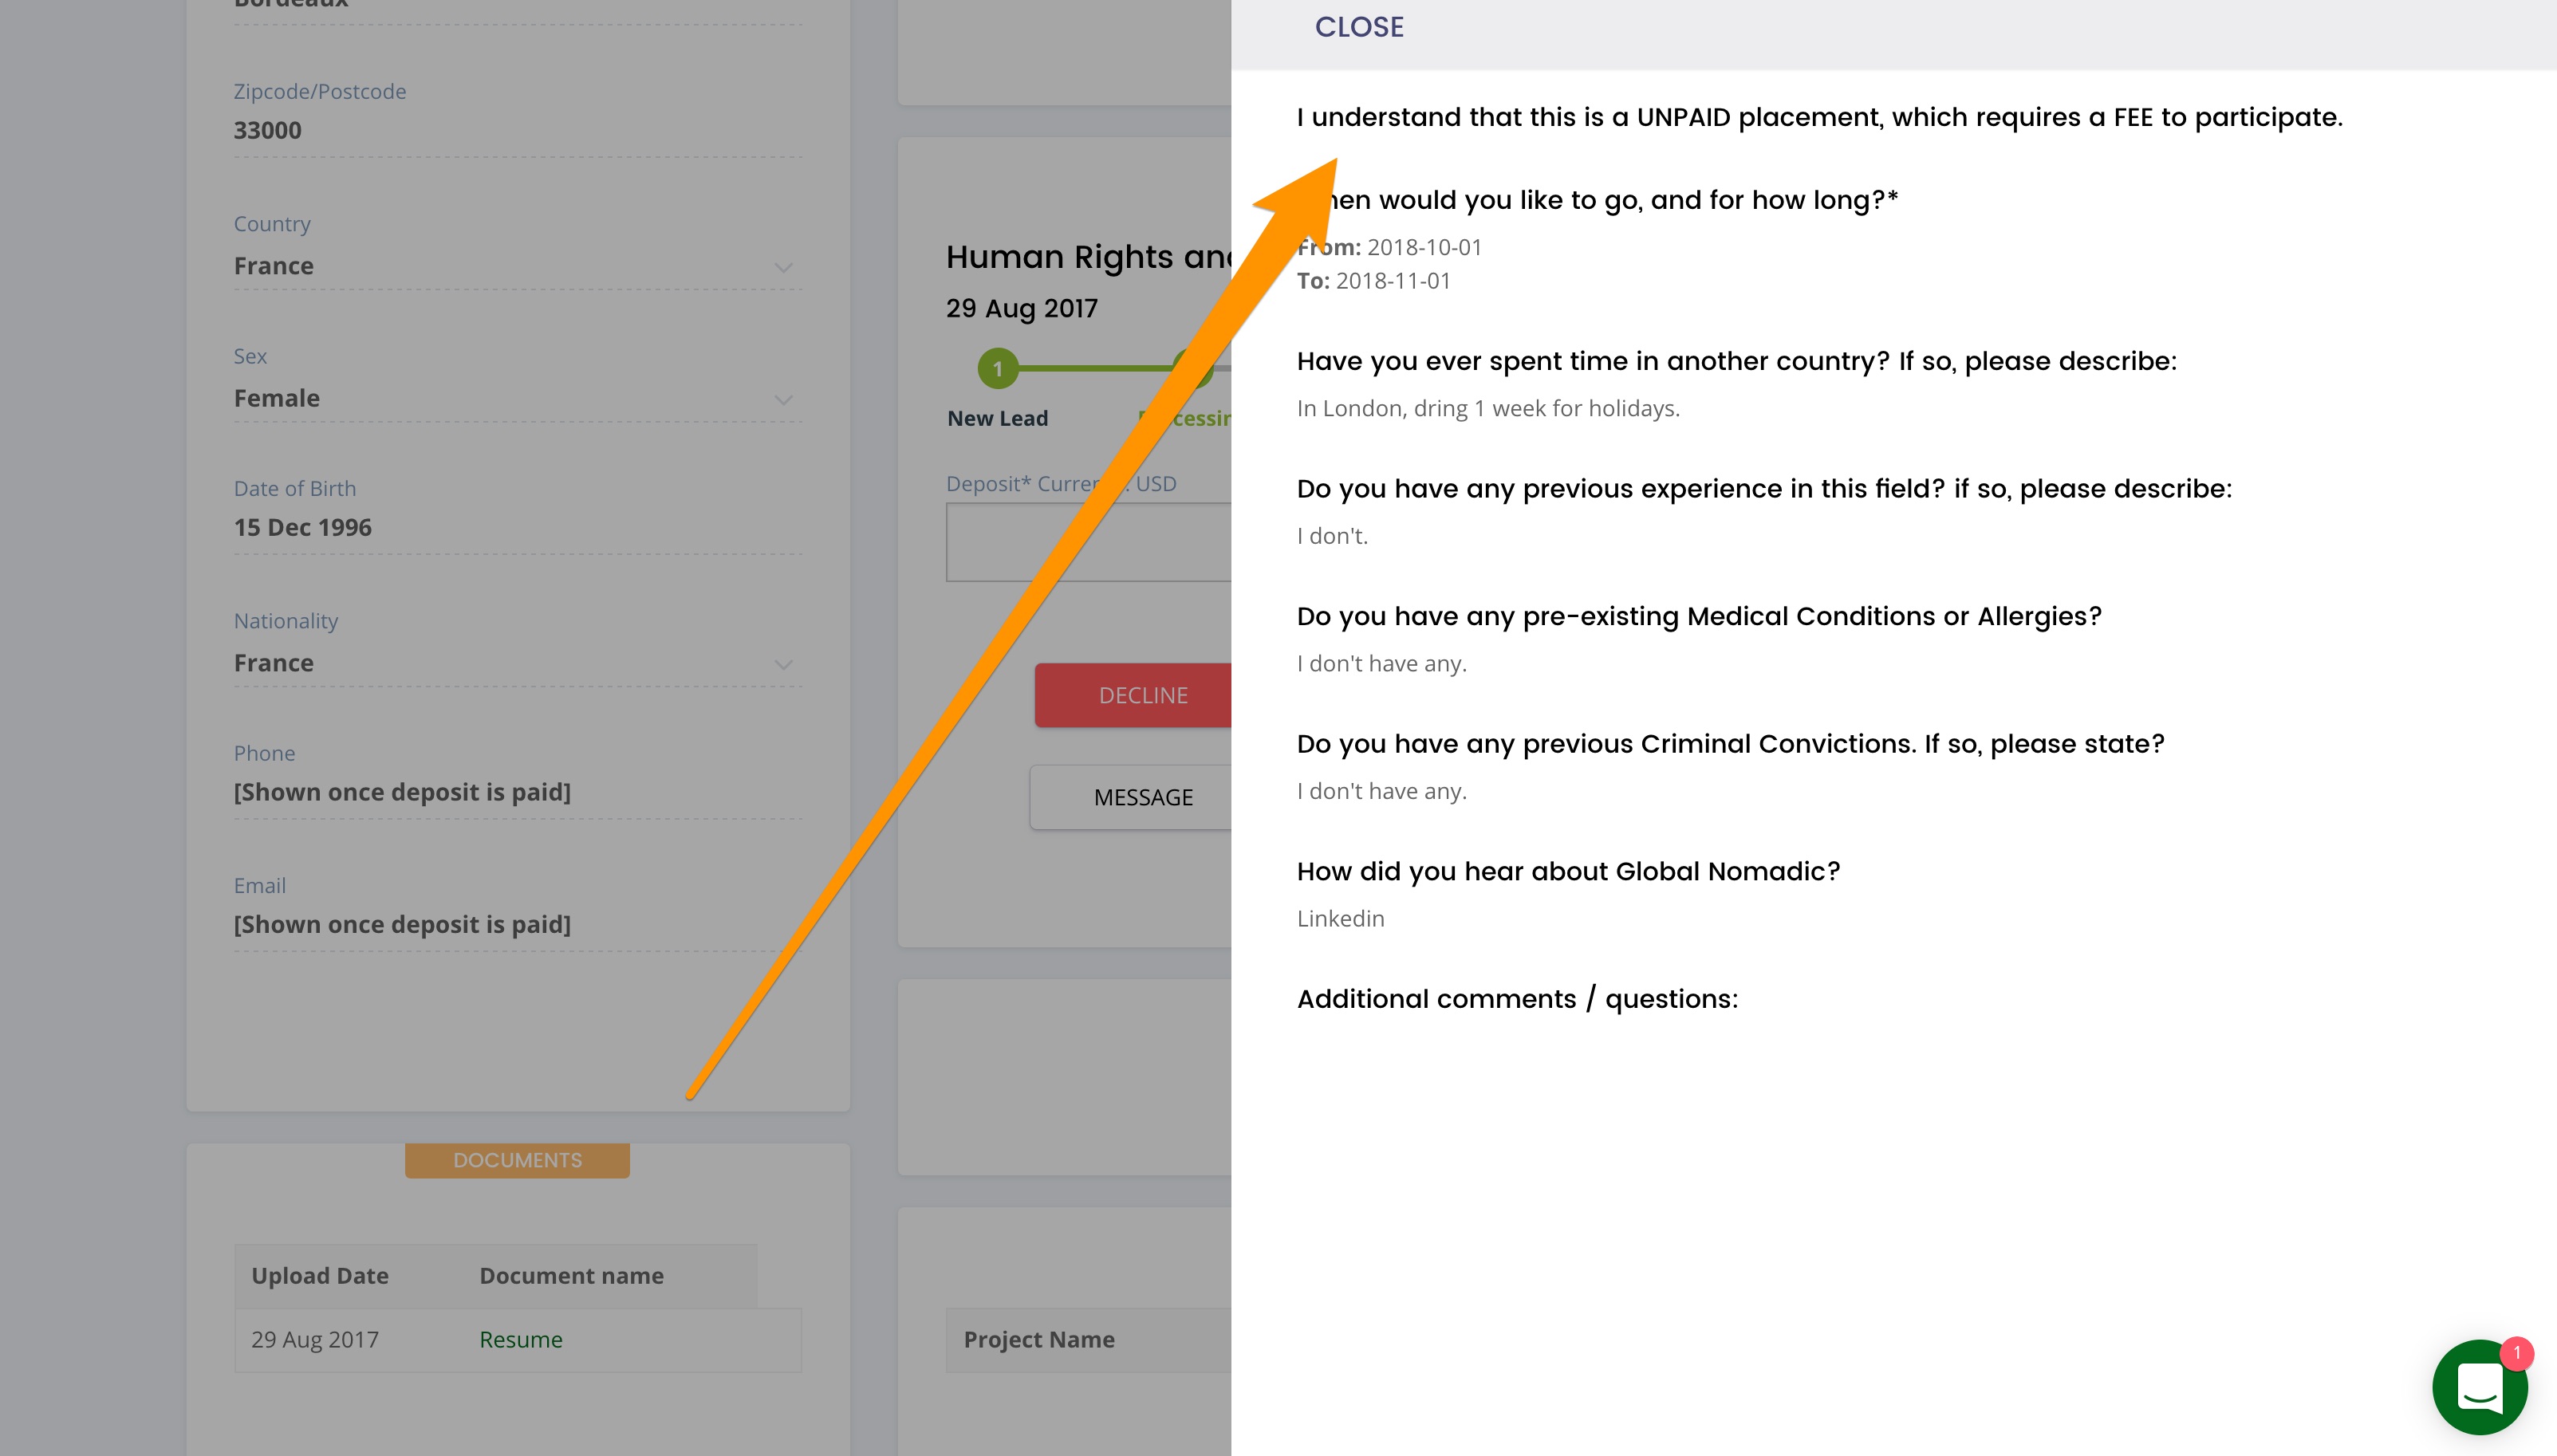
The first step is to check the Application Form, you can do this by clicking the View Application button, shown below.
We can edit this form specifically for you, so if you have any custom questions you wish to add, let us know.
3b) Review Costs button
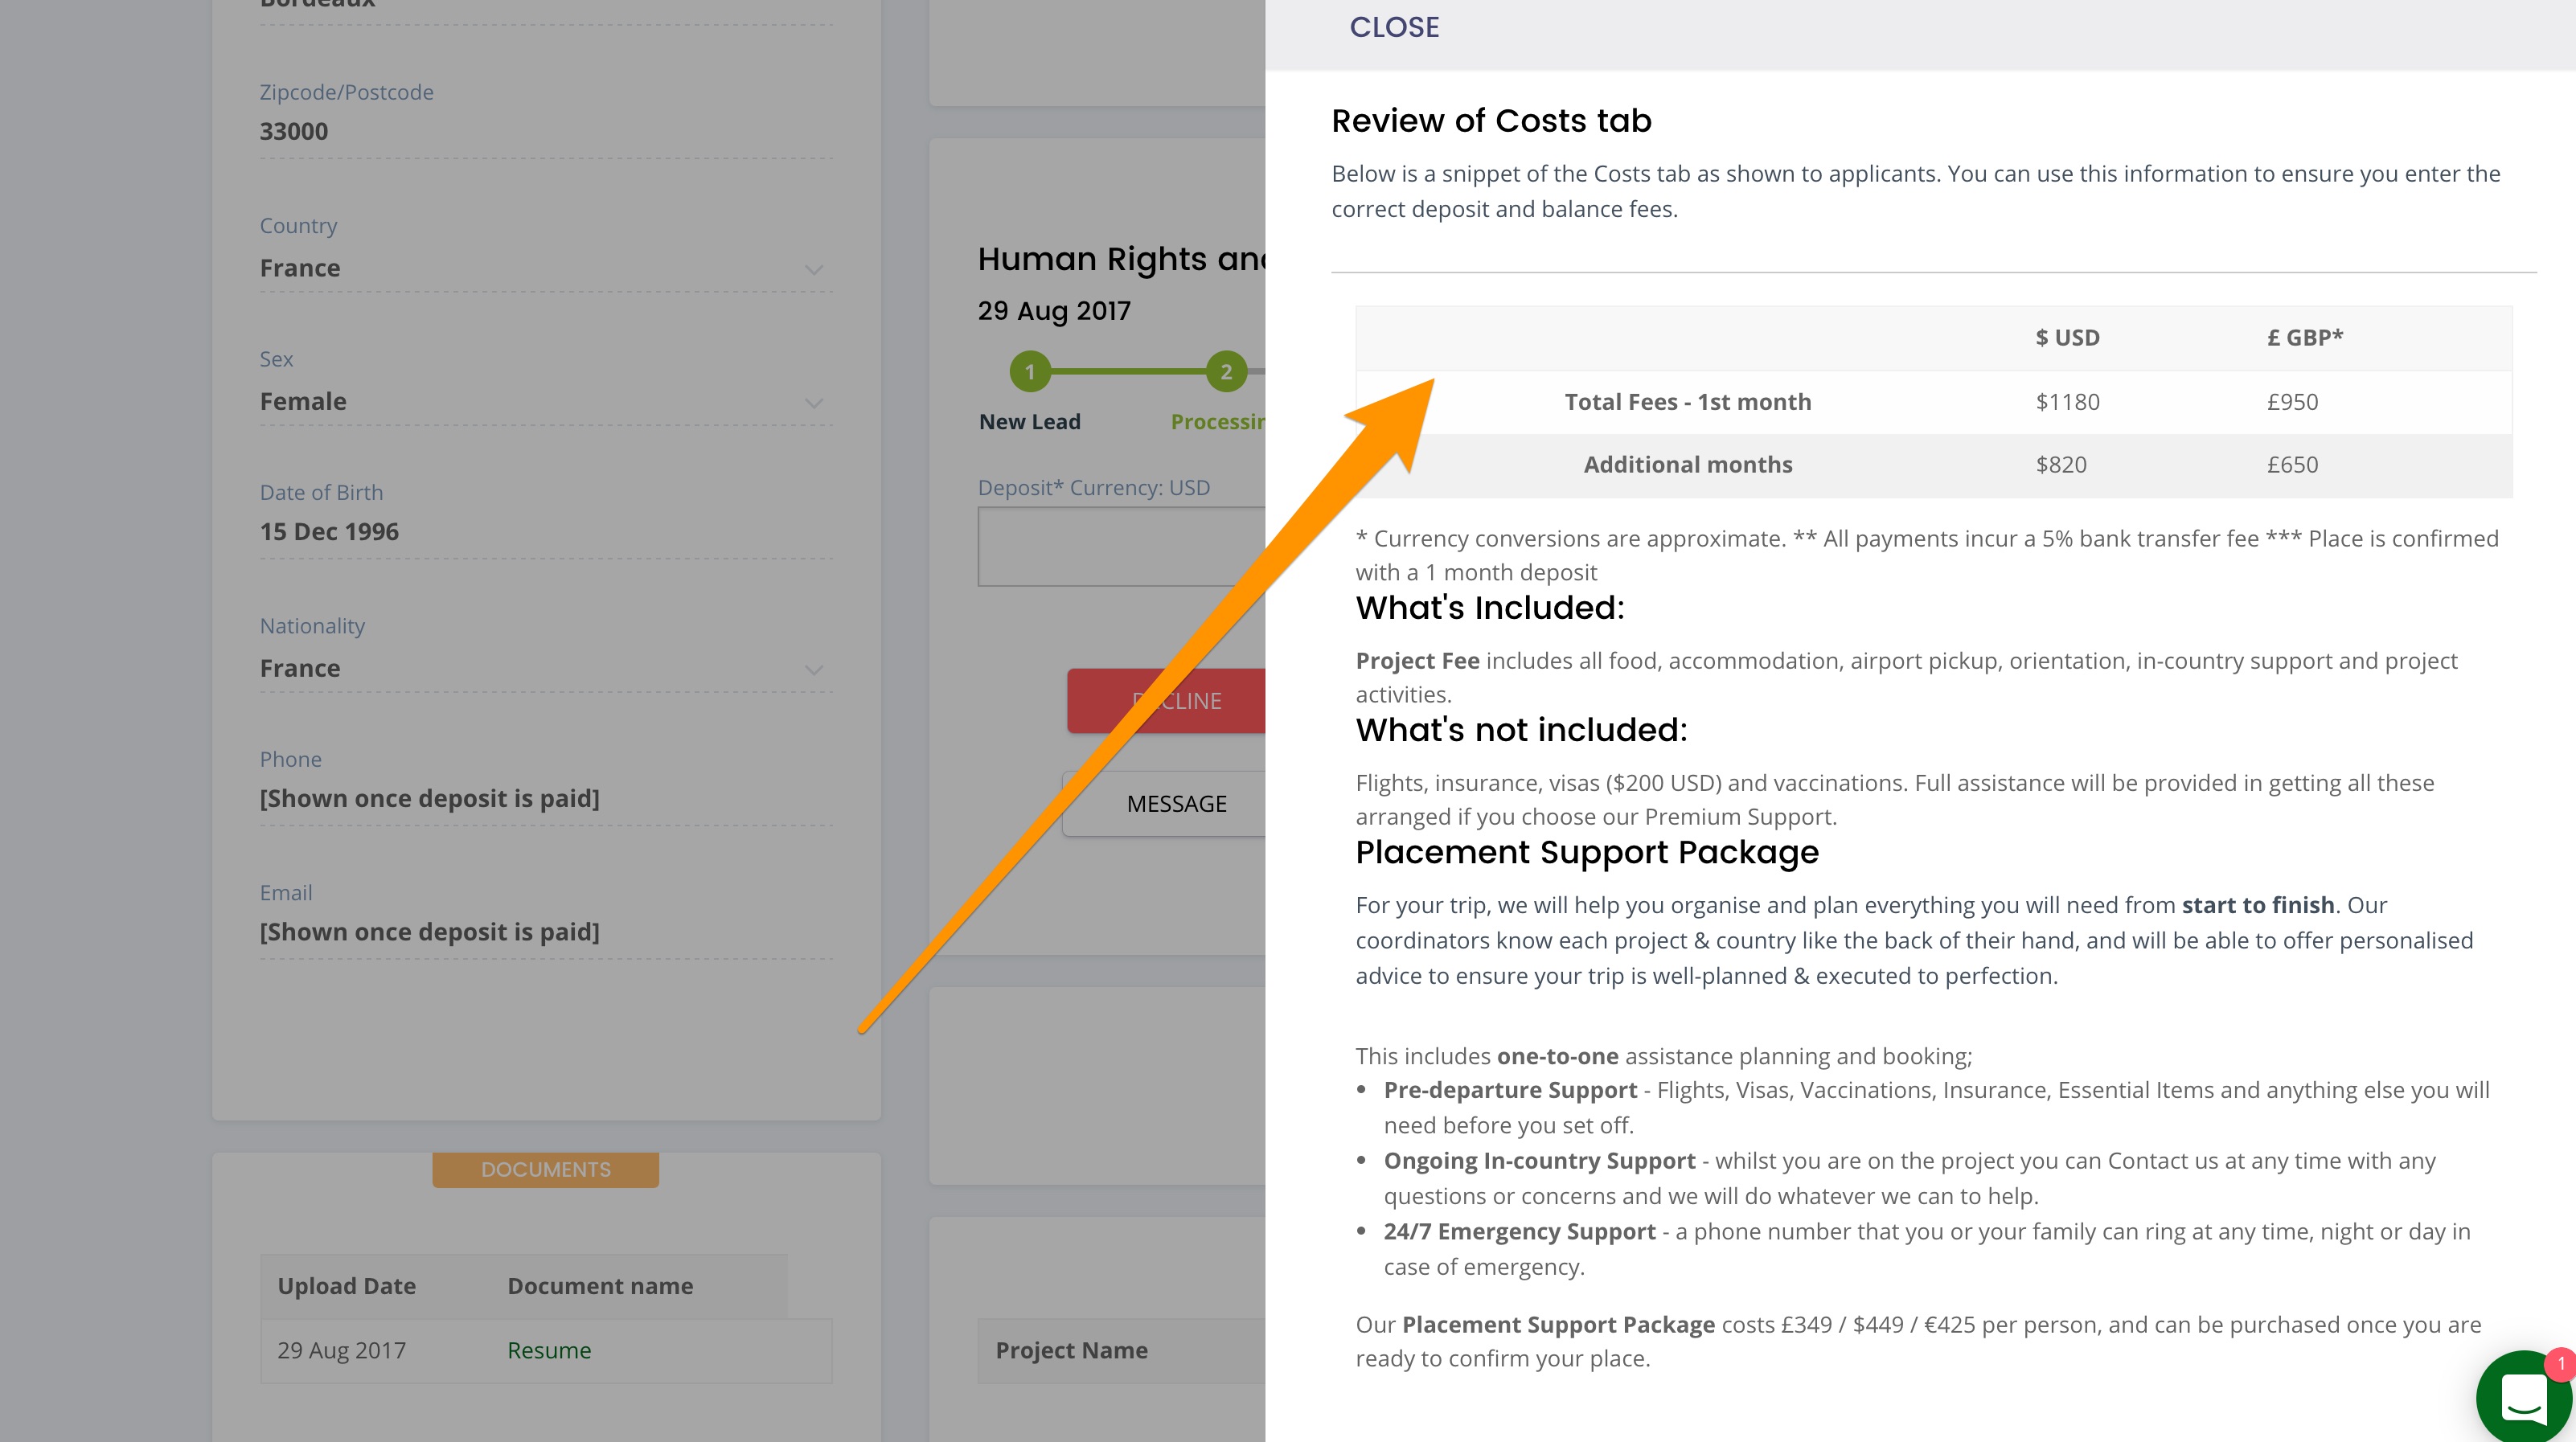
Before you can Approve an application, you must enter the Deposit Amount. You can easily find what is written on the front-end of our site, by clicking the Review Costs button. This way no mistake can be made and the applicant is charged exactly what they are expecting to pay.
3c) Approval Message
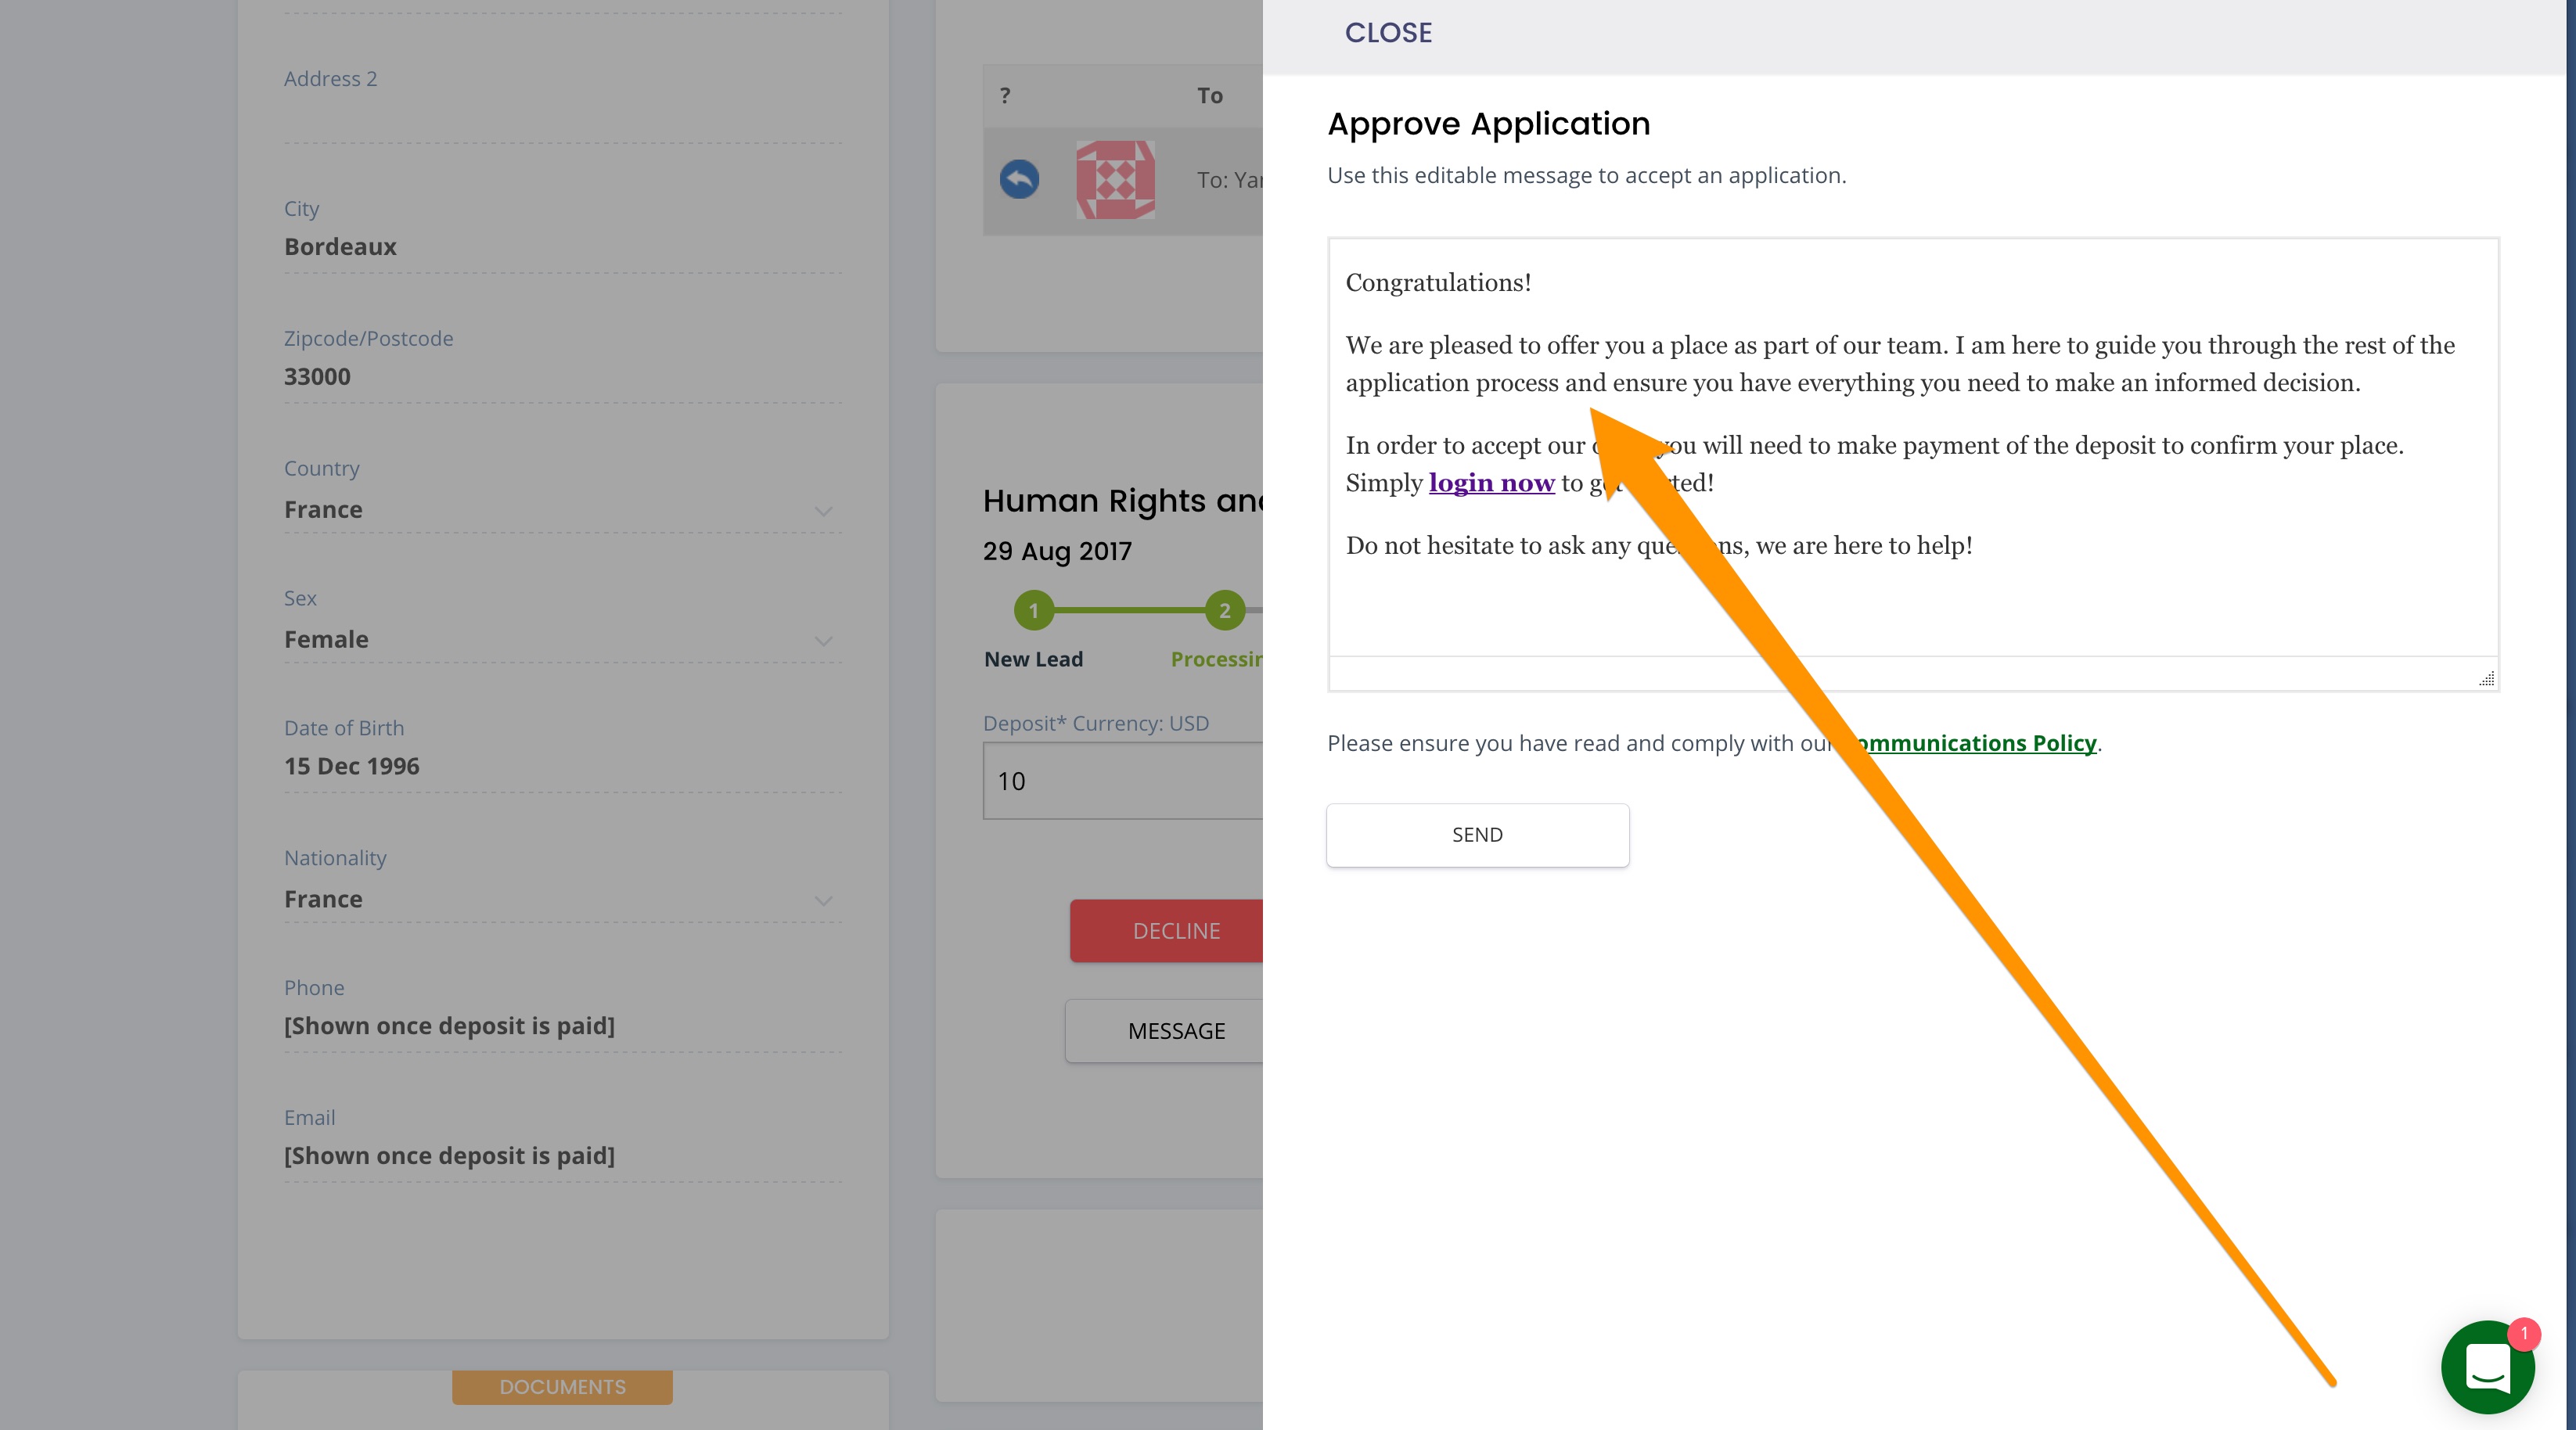
Once you have entered the Balance Fee amount, you are able to Approve an application. An editable text box will popup with a template text of what we believe is a strong approval message.
However feel free to make this your own and edit the text as much as you may wish – perhaps add their first name, the dates they have been accepted for, answers to any of their questions, or anything else that is relevant and appropriate.
If you write a nice message, we think you are more likely to get a positive response and convert the booking.
3d) Chasing
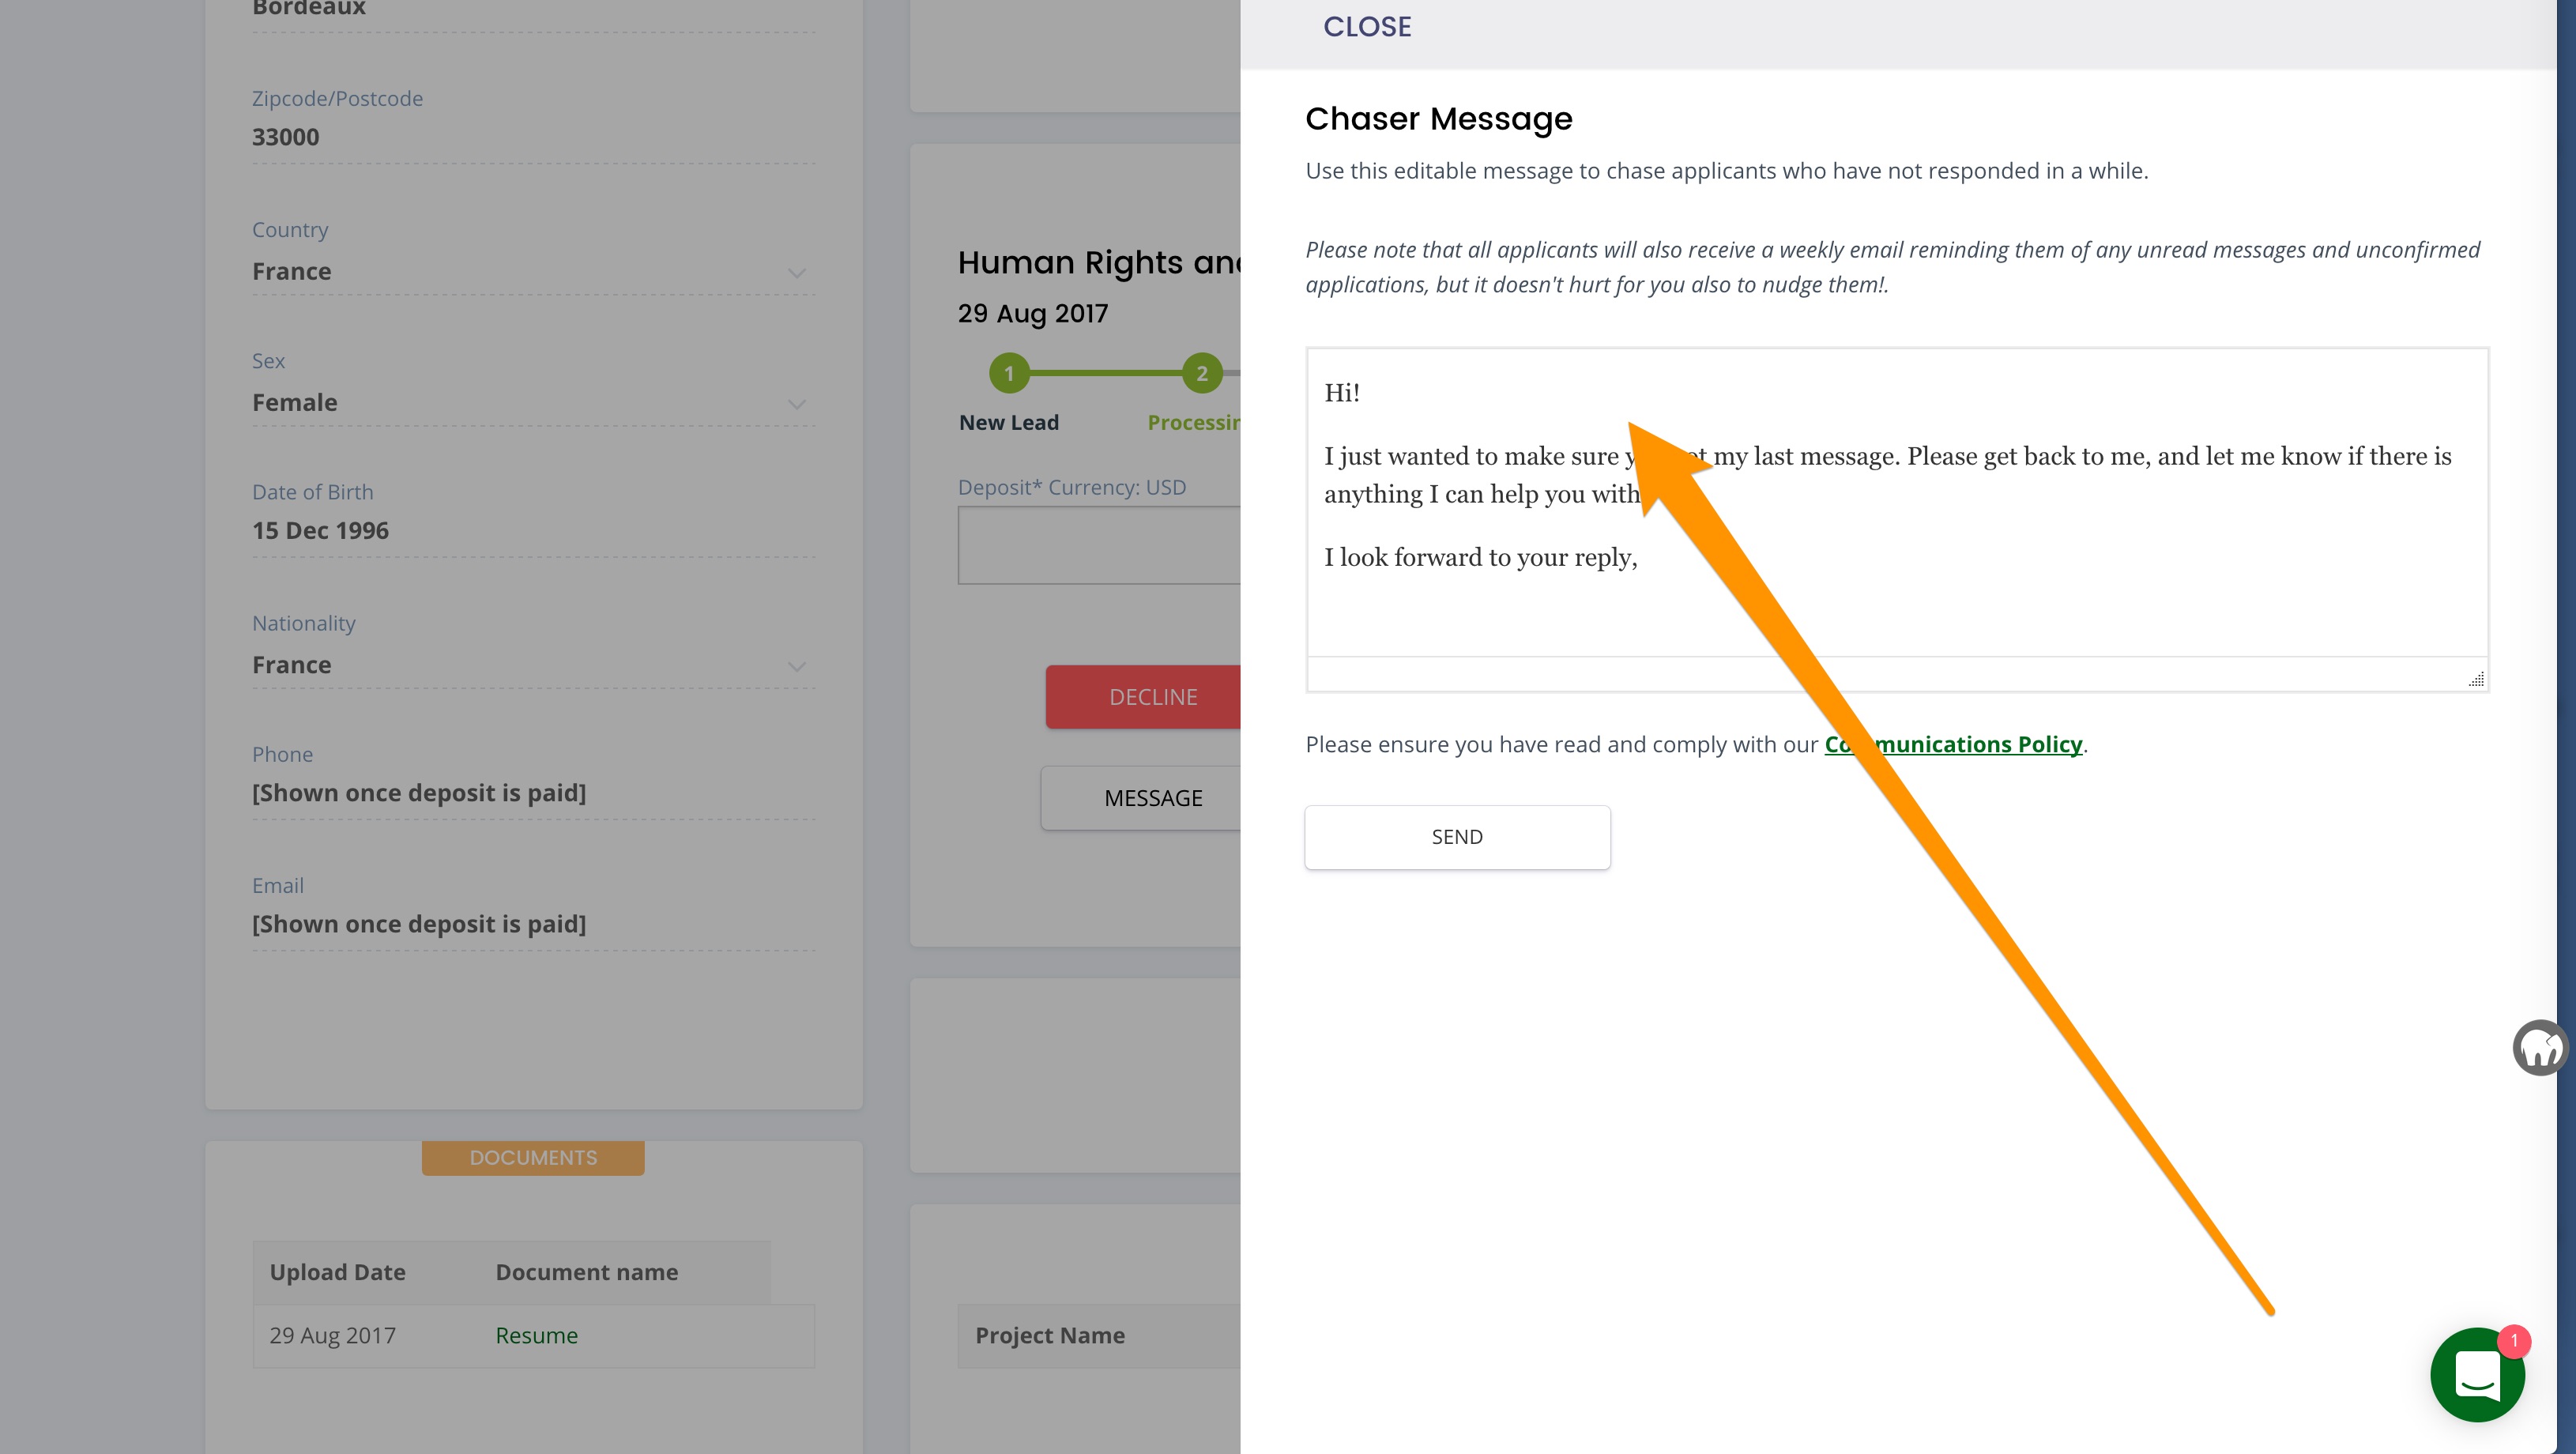
If you have not heard back from an applicant in over 5-7 days, we recommend you Chase them. You can do this by clicking the Chase button, which will open up an editable text box. Change the text if you wish and press send. The applicant will then be sent your message.
4. Deposit Paid
Once an applicant has paid their deposit, you will firstly receive an automated email notification. Please note that all payments incur a 5% bank transfer fee paid by the applicant.
The application card will automatically be moved into the Deposit Paid status.
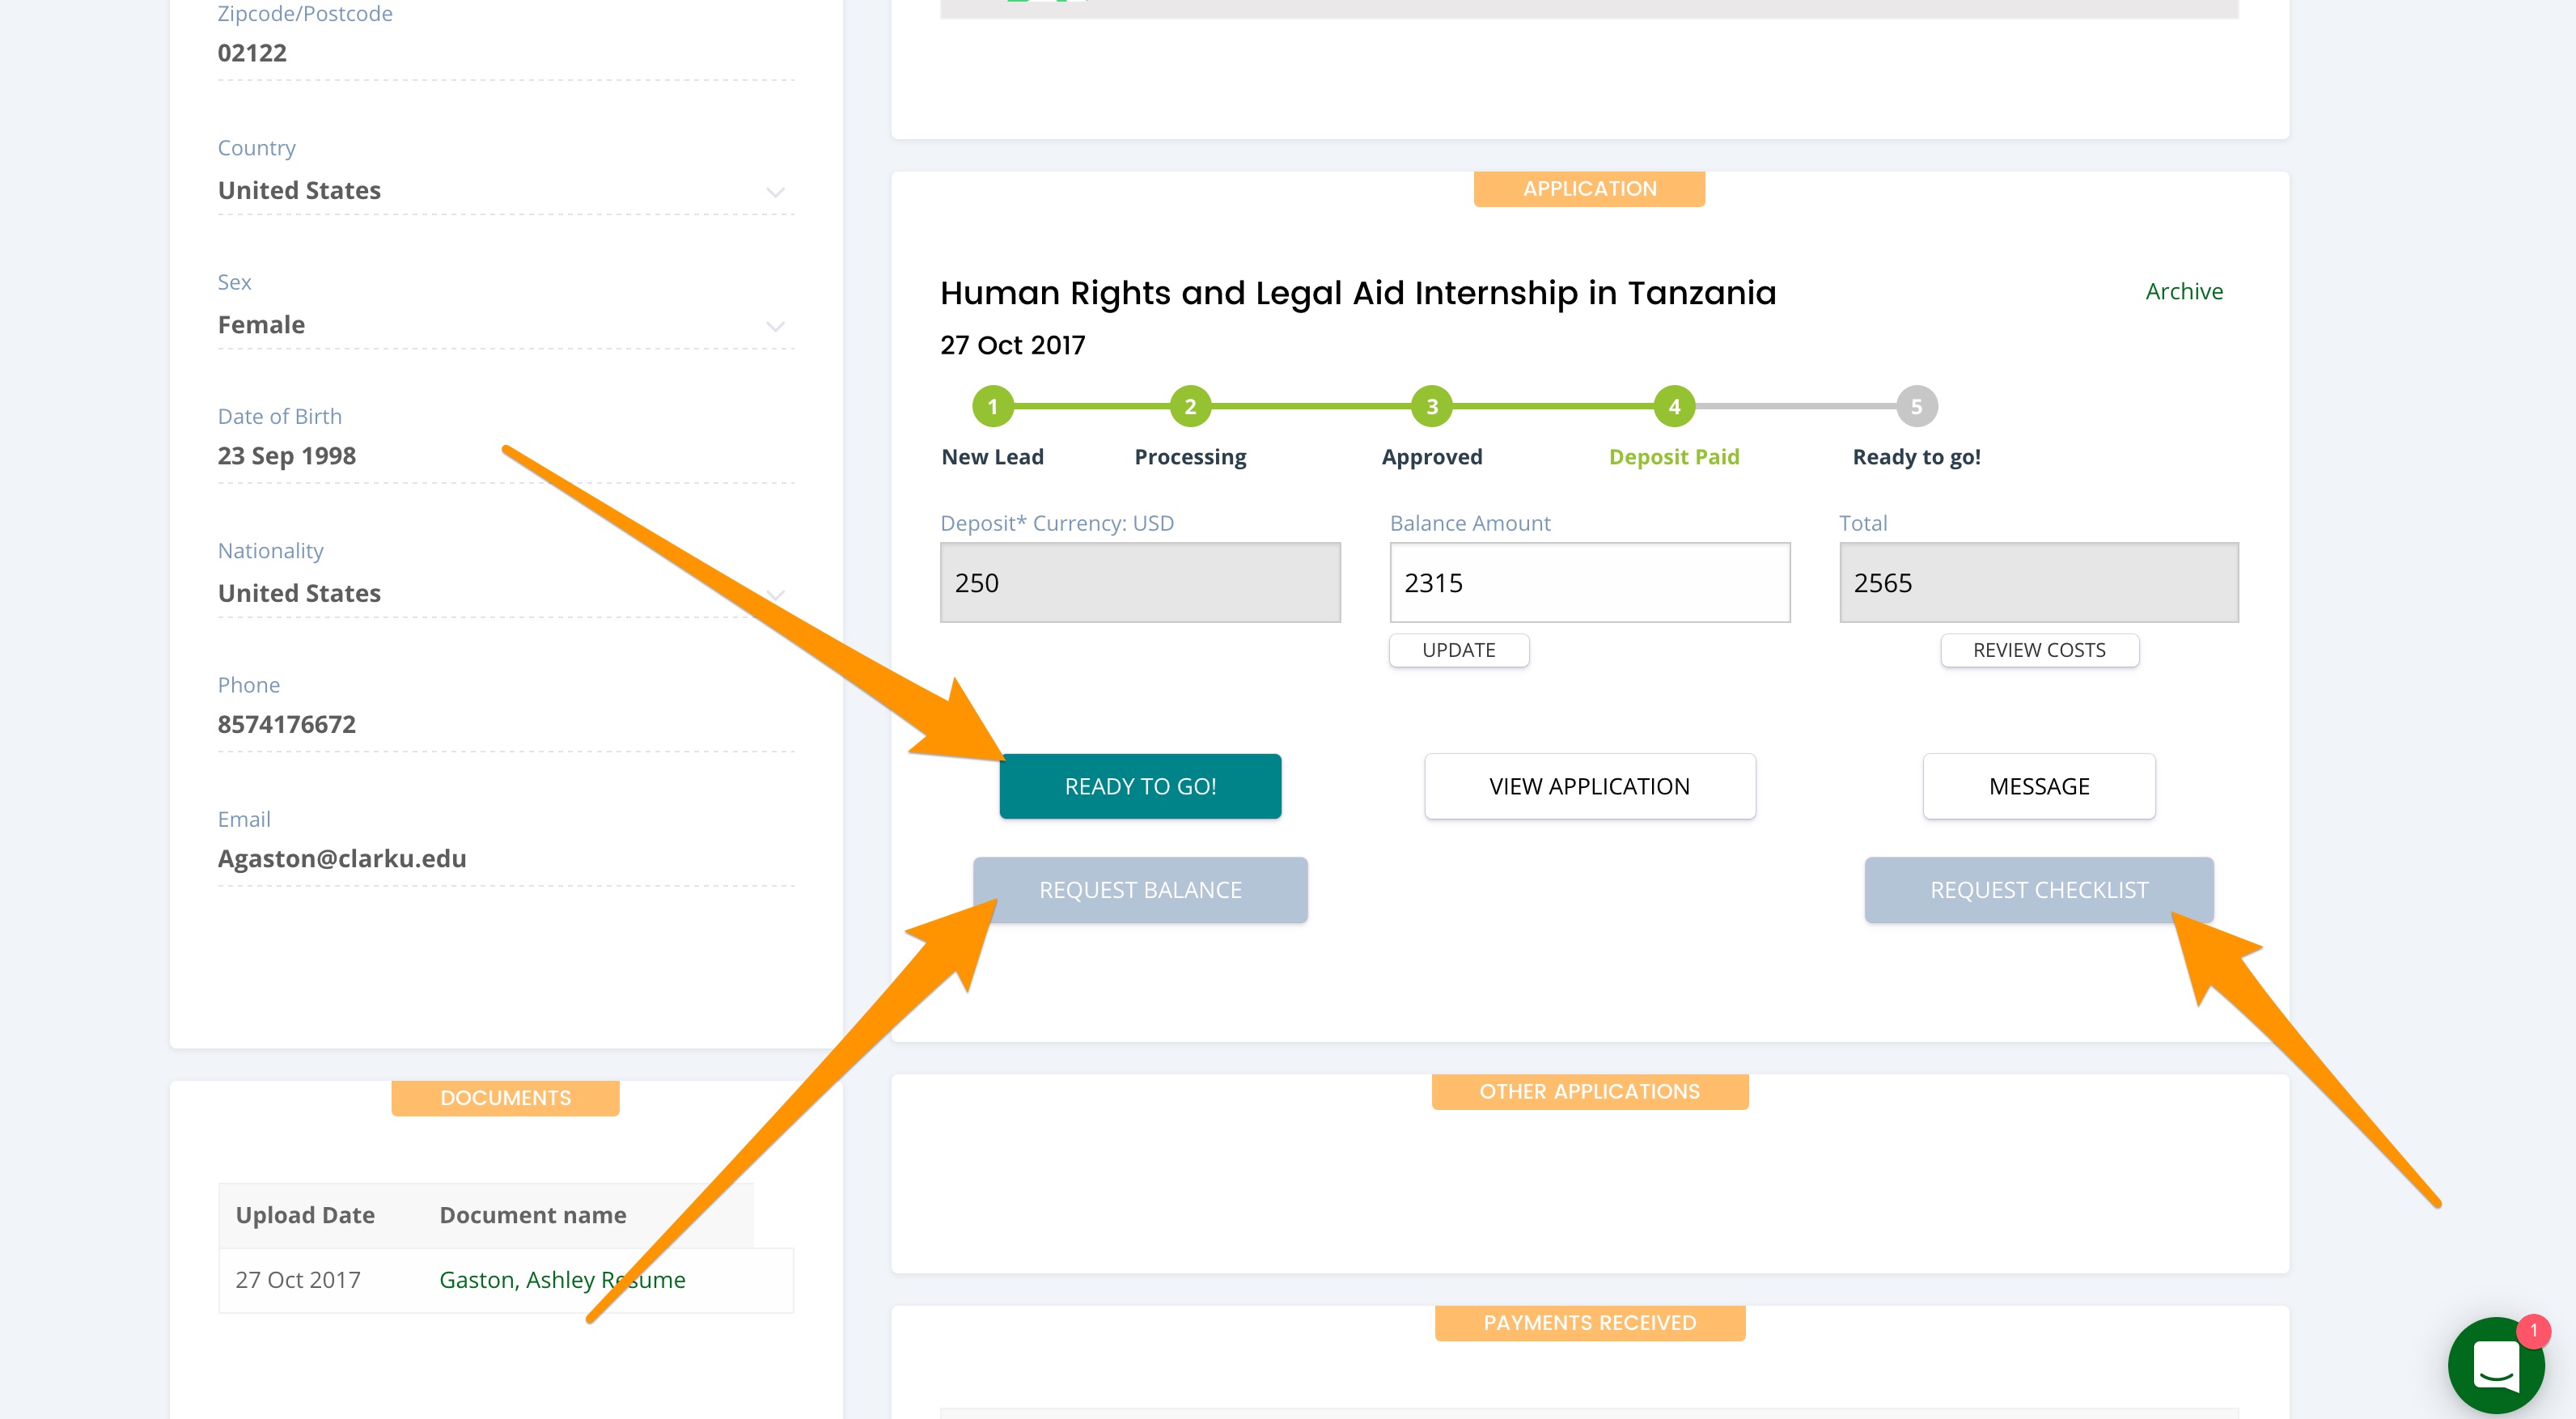
You will now have be able to Request the Balance Payment (press this at least 4 weeks prior to their arrival) and Request the Checklist (details on their flights, visas, vaccinations etc.). See the next section for the Ready to Go button.
4a) Update Balance Fee amount
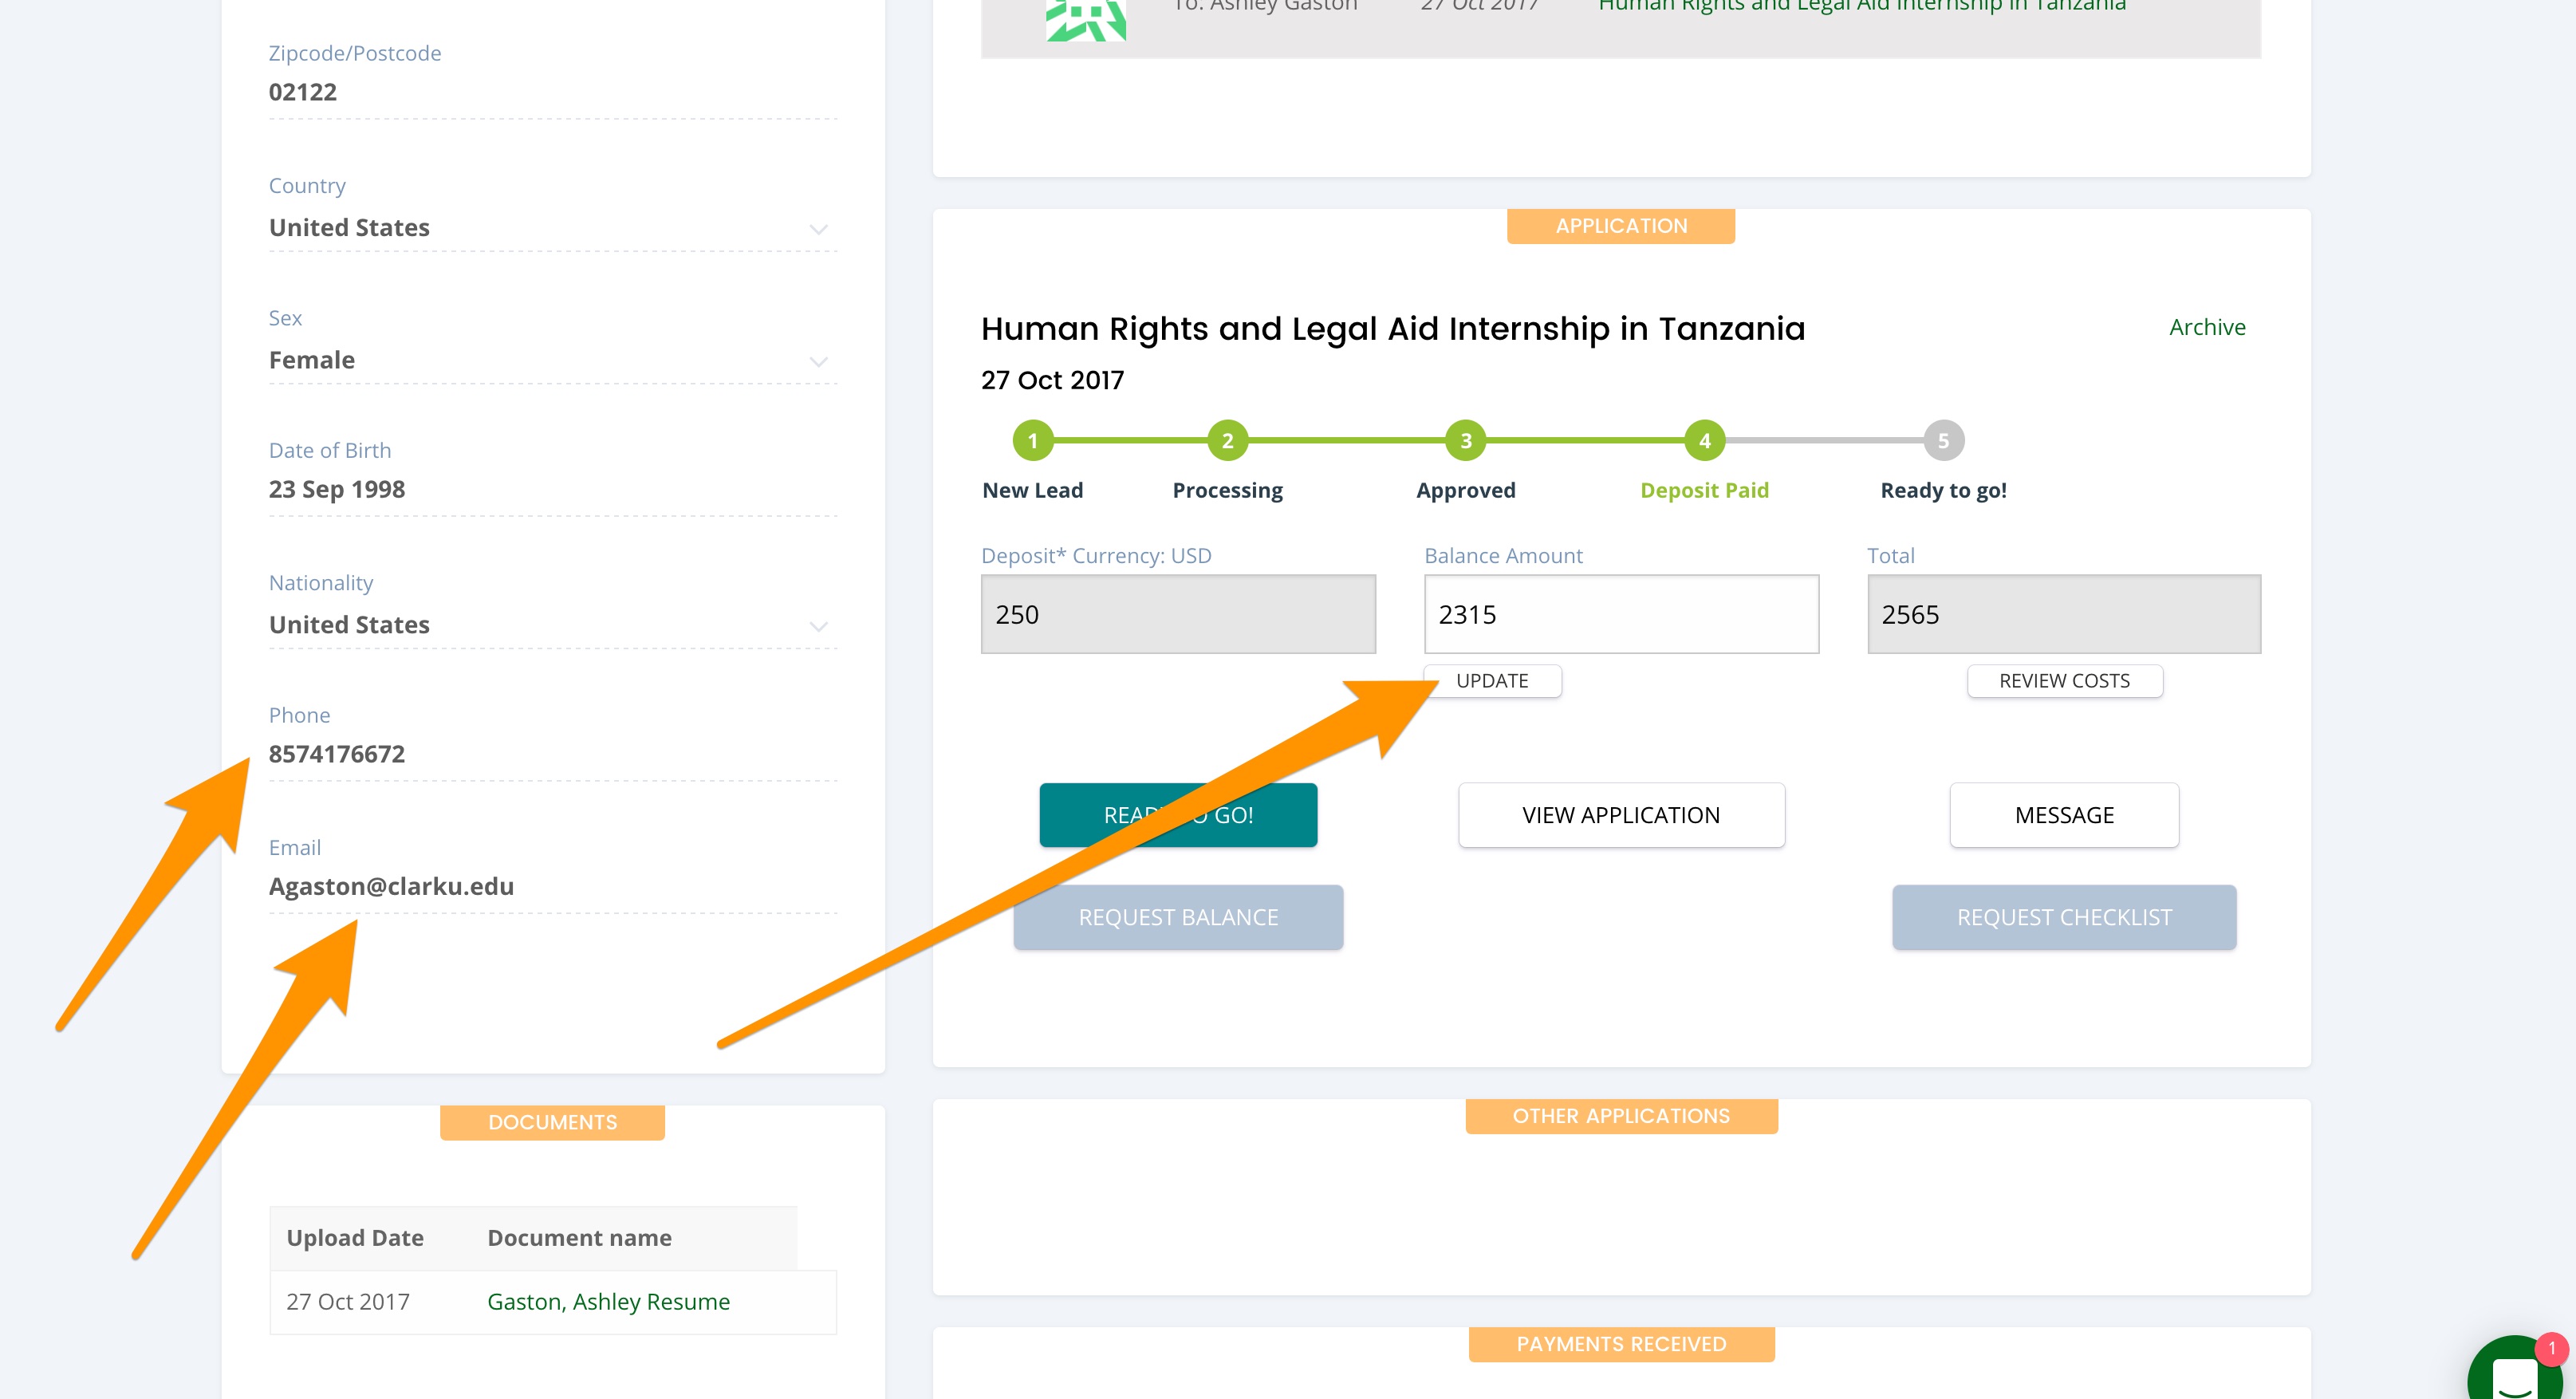
After the application is past the Approved status, you can add/edit the Balance fee amount and press the Update button.
Note: that you will also have access to the applicant’s email and phone number once they have paid their deposit.
Depending upon our arrangement, either the deposit is our commission and they pay the balance directly to you, or we collect everything, and you invoice us minus our commission. We usually ask applicants to pay the balance at least 30 days prior to their arrival.
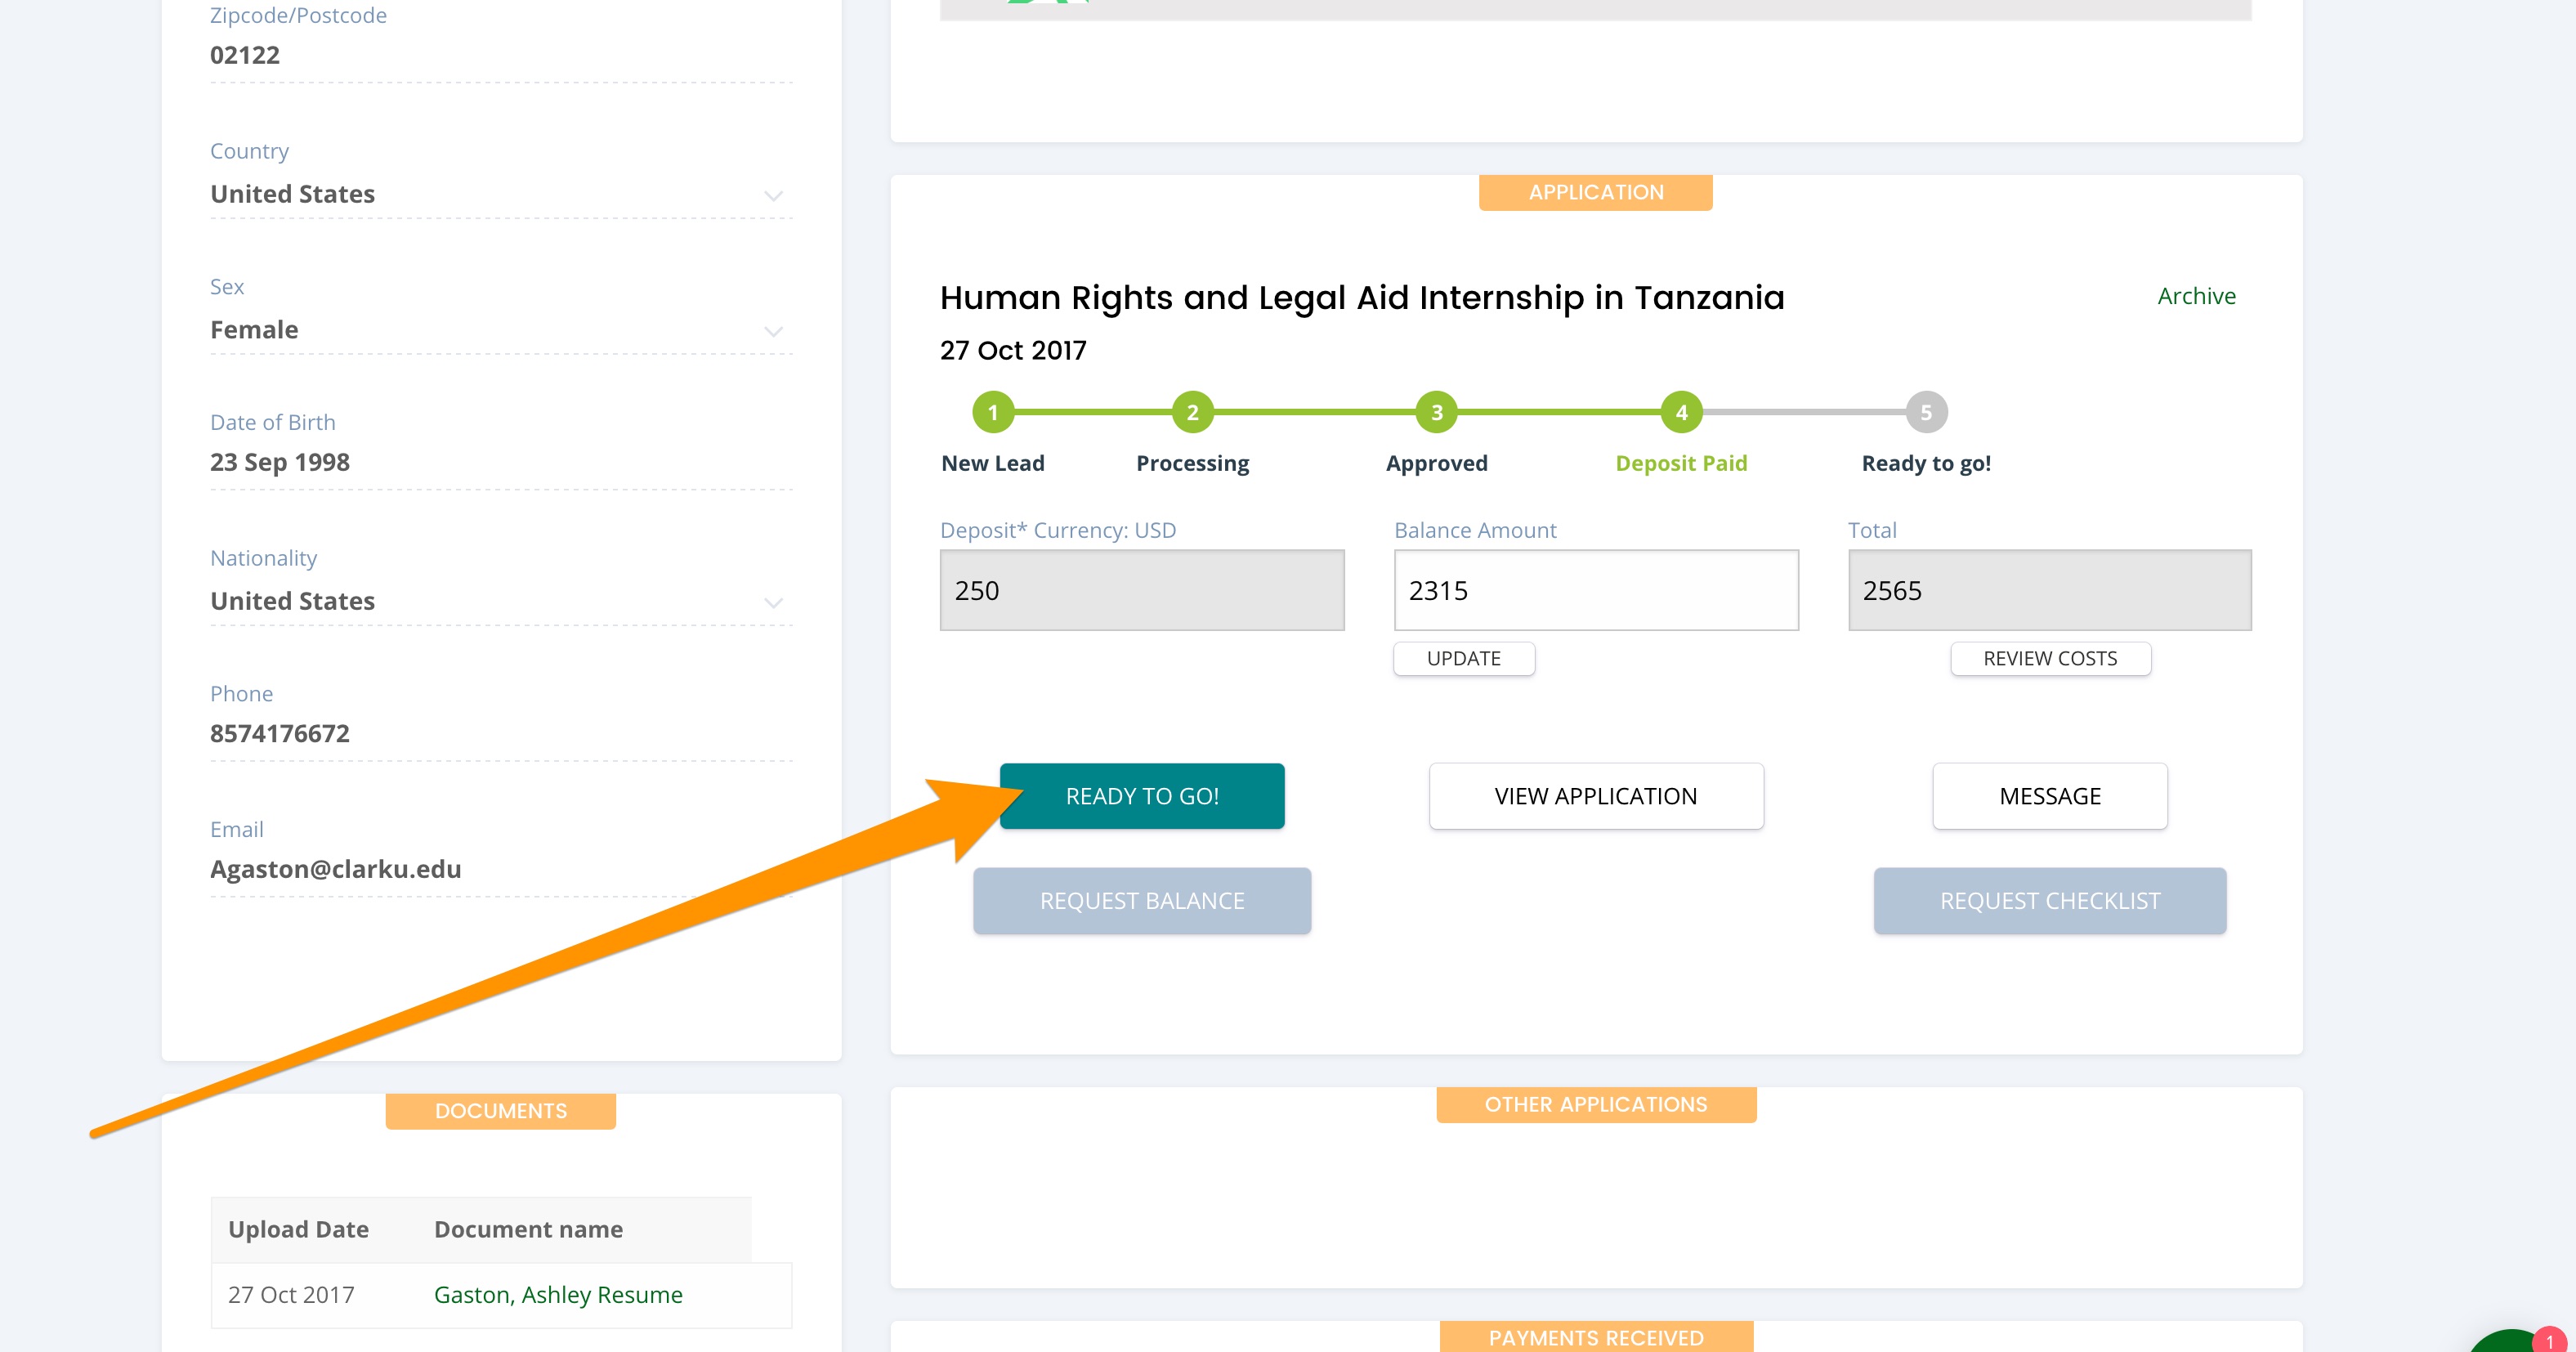
5. Ready to Go
Once everything has been received and paid for, click the Ready to Go button and the application will be moved to the final pipeline.
This means that the applicant is ready for their arrival!
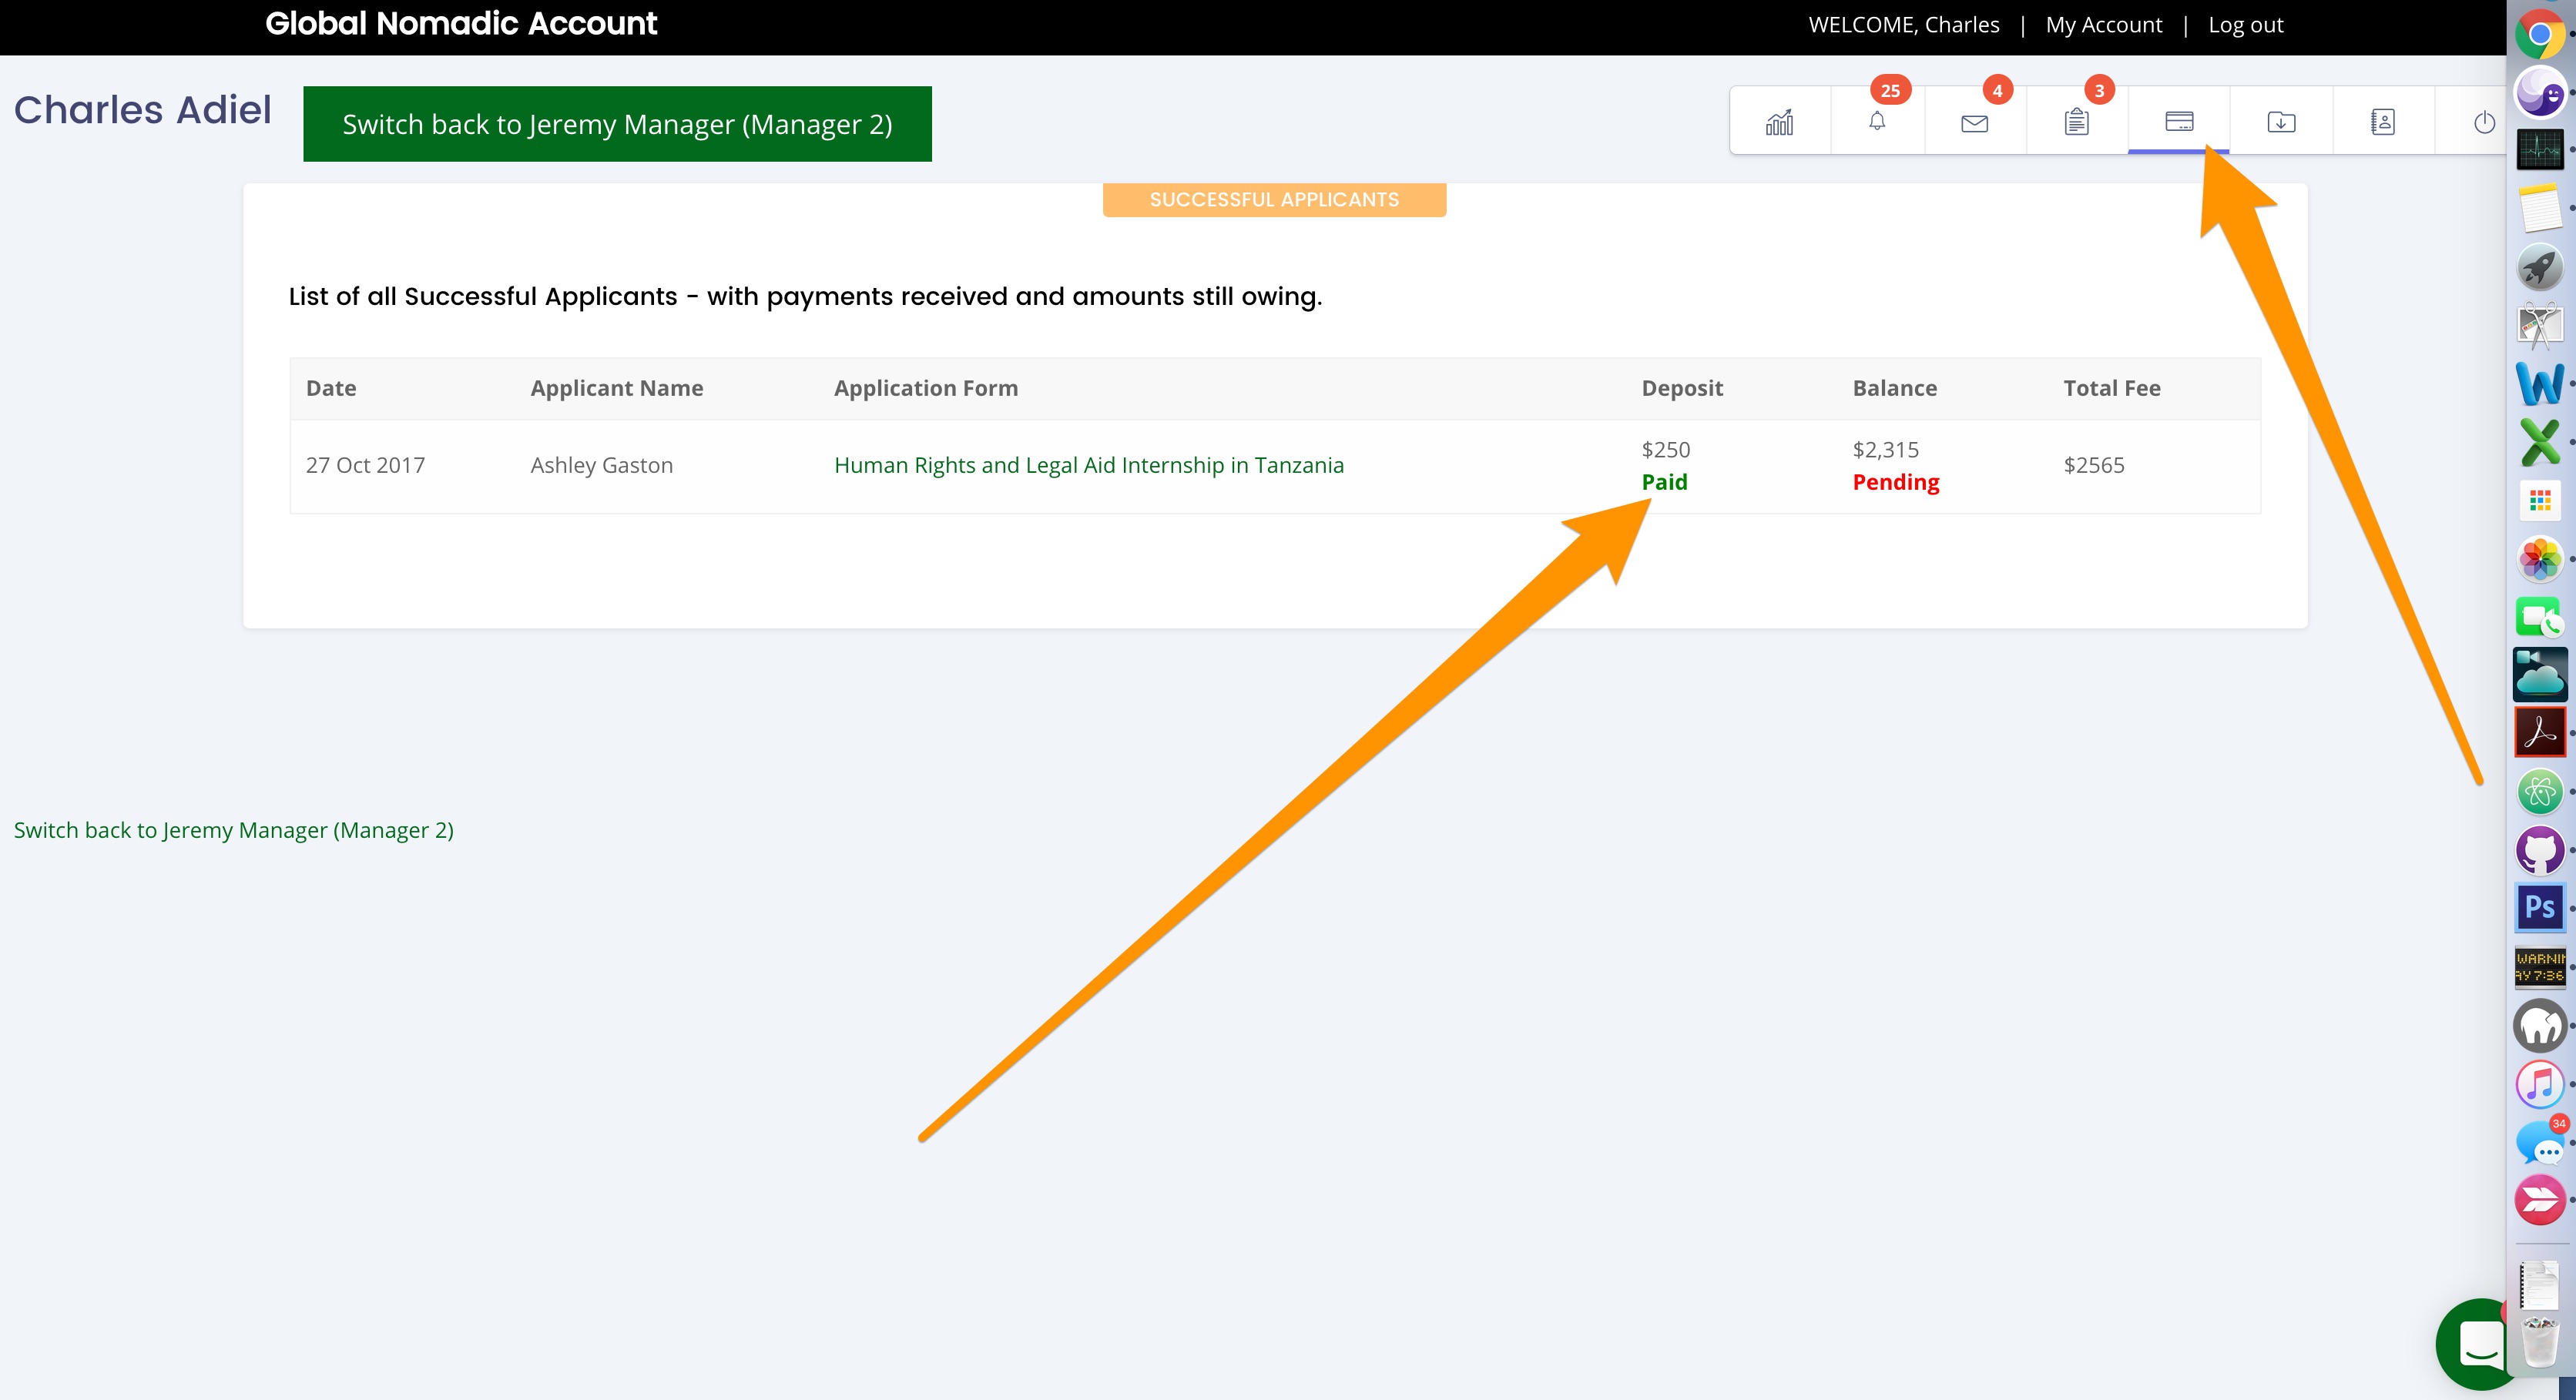
5a) Successful Payments
Click on the shown icon in the top right menu to see all of your Successful Payments and their application forms.
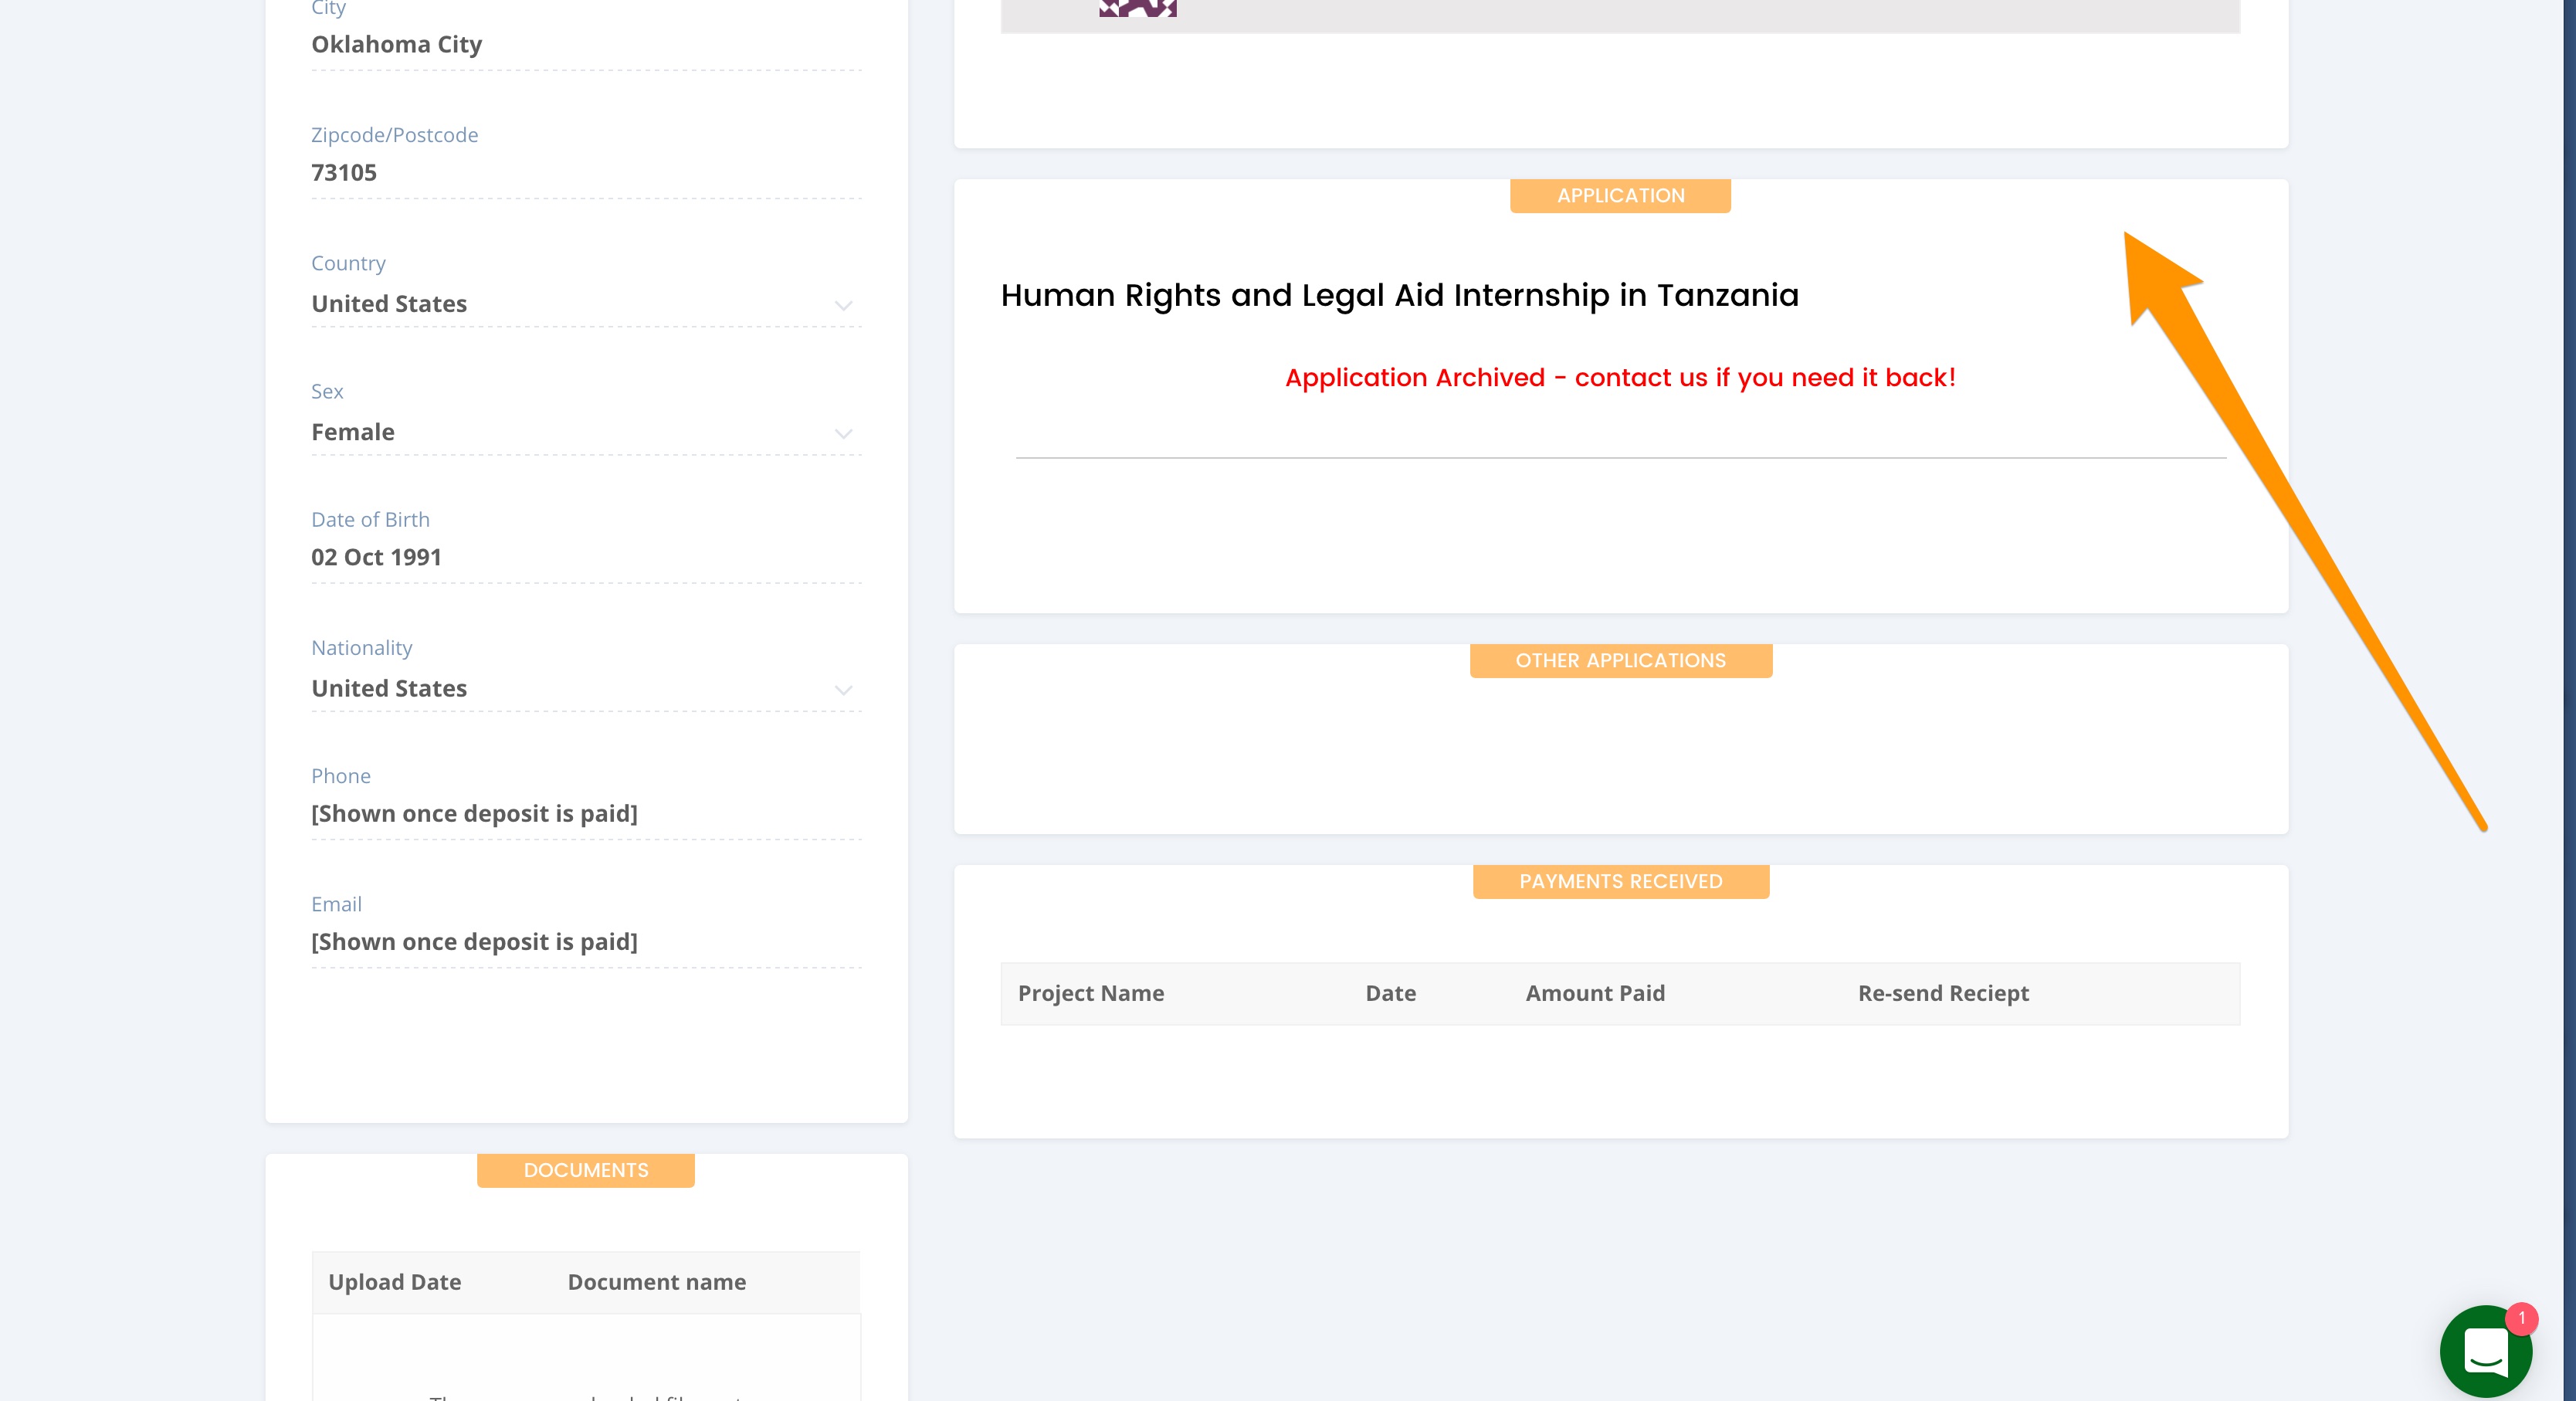
5b) Archive Application
If an applicant is no longer interested, has not responded in a long time, or has attended your project and since left, you can Archive the application, simply by clicking the Archive link in the top right of the application box.
If you need to retrieve an archived application, let us know and we will restore it for you.
If any of your questions are not answered here, or you are experiencing any problems, do not hesitate to Get in Touch.
